Snickerdoodles have one of the most distinctive flavors of any kind of cookie. The cinnamon sugar, combined with the tanginess usually provided by cream of tartar, makes them one of our all-time favorite snacks.
With that being said, you can still make snickerdoodles even if you don’t have any cream of tartar. Sure, they won’t taste exactly the same, but they will still be absolutely delicious.
Without cream of tartar, snickerdoodles don’t have the same tangy aftertaste, but the cinnamon sweetness remains. In fact, once you’ve tried making snickerdoodles without cream of tartar, you might find that you actually prefer the new flavor!
If you’re asking, ‘can you make snickerdoodles without cream of tartar’, our answer is yes – here’s how to do it:
What Are Snickerdoodles?
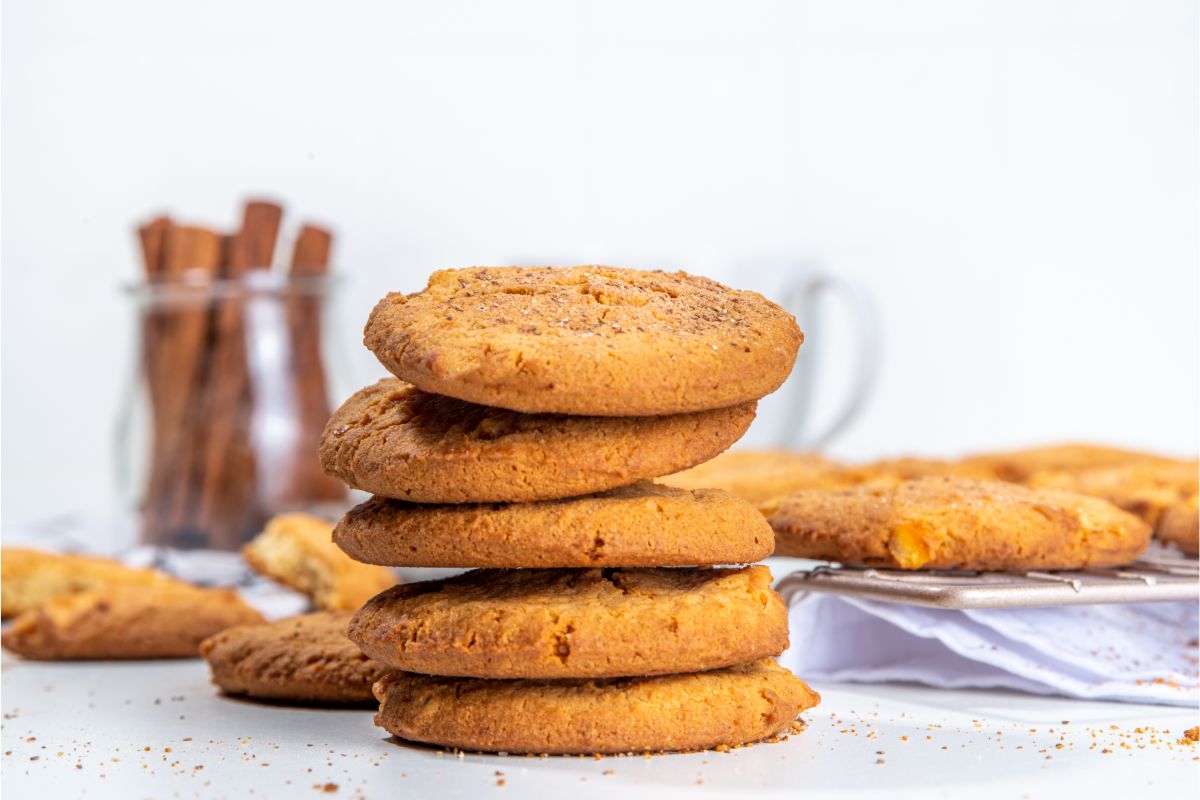
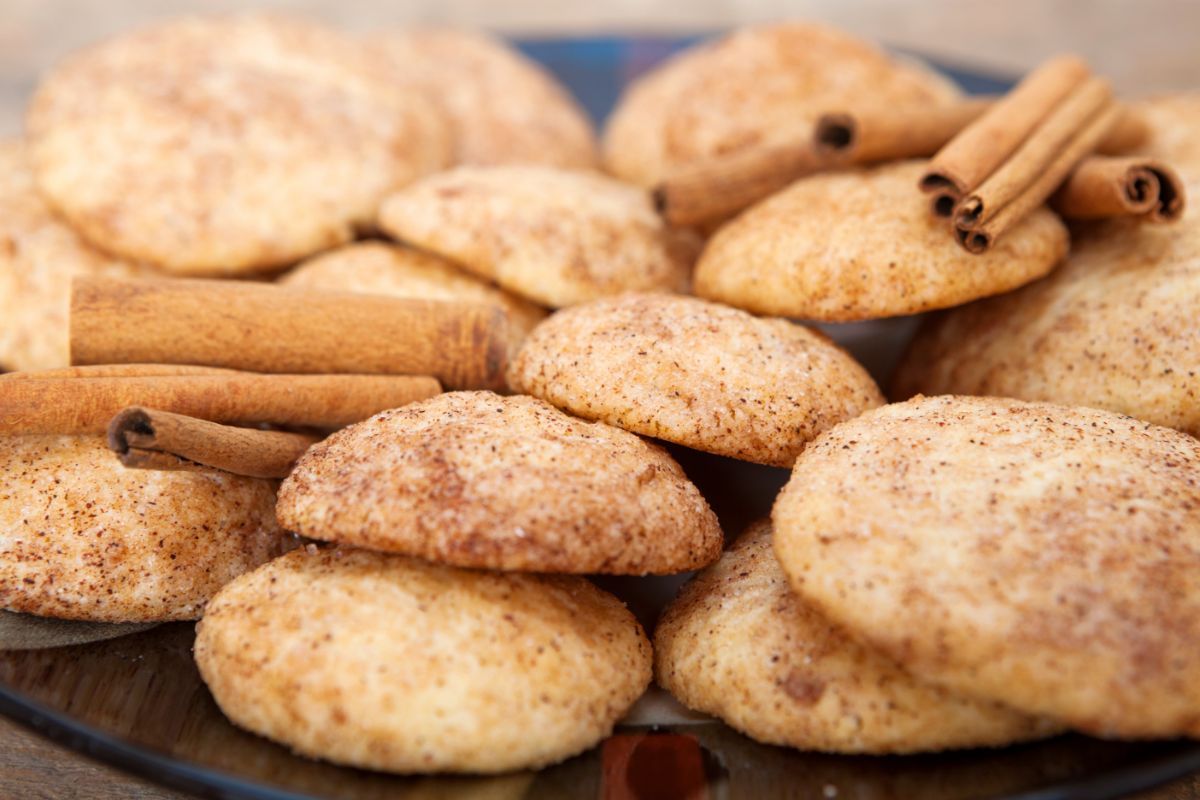
Snickerdoodles are cookies with a cinnamon sugar coating. They are known for their unique texture, with crispy edges and a cracked surface. Inside, snickerdoodle cookies are chewy and soft.
Typically, snickerdoodle cookies are made with cream of tartar, which gives them a tangy, slightly sour taste alongside the sweetness and spice. However, it’s possible to make snickerdoodles without the cream of tartar, as long as you don’t mind losing the tangy aftertaste.
When made without cream of tartar, snickerdoodles taste and feel like sugar cookies with a chewy texture.
The History Of Snickerdoodles
Snickerdoodles were actually created based on a cake! Back in the 19th century, there was a butter, cinnamon and coffee cake with sugar dusting known as the Snip Doodle. Food historians believe that this was the origin of the snickerdoodle.
Interestingly, for those asking whether it’s possible to make snickerdoodles without cream of tartar, many bakers originally didn’t use this ingredient at all.
When Cleveland Baking Powder advertised their products in 1891, they actually used snickerdoodles to demonstrate how baking powder could be used.
In the 1890s, baking powder was not yet a common pantry staple. It was invented in the 1840s, and was originally designed to ensure bread could rise in the oven in the absence of yeast. Early versions of baking powder contained cream of tartar, but also flour and soda.
Baking soda combined with an acidic ingredient was the popular choice for leavening at the time. While the earliest versions of snickerdoodles relied on cream of tartar along with baking soda, as baking powder became more popular, bakers started using it instead.
Baking Soda And Cream Of Tartar Vs Baking Powder
Baking soda and baking powder are frequently confused, and some people even use the terms interchangeably, but they are two different ingredients that cause different reactions in baked goods.
It’s also important to understand how the chemistry of cream of tartar differs from both baking soda and baking powder.
For one thing, baking soda is an alkaline ingredient, while the pH of cream of tartar is acidic. When cream of tartar dissolves, it releases acid into the batter.
This acid reacts with the baking soda, and carbon dioxide is created. This carbon dioxide is what causes the leavening reaction, making the cookies rise.
After the initial rise during baking, snickerdoodle cookies made with a combination of baking soda and cream of tartar will flatten during the cooling process.
You can also tell when cream of tartar has been used alongside baking soda because the surface of the cookie cracks visibly, and of course, you get that tangy aftertaste.
Another result of making snickerdoodles with cream of tartar is that the gluten in the cookies will be weakened. This means that the crumb will be tighter and finer. It will also look whiter.
The good news if you don’t have any cream of tartar is that you can pretty much get the same results (minus the tangy flavor) by using baking powder instead.
Ingredients For Snickerdoodles (Minus Cream Of Tartar)
The ingredients for snickerdoodles without cream of tartar are pretty much the same as the regular recipe. The only difference is that instead of cream of tartar and baking soda, you’ll be using baking powder.
The full ingredients list is as follows:
All-purpose flour (396 grams / 3 cups, 1 tbsp)
Unsalted butter (227 grams / 1 cup)
Baking powder (4 grams / 1 tsp)
Granulated white sugar (330 grams / 1 ⅔ cups)
Table salt (3 grams ½ tsp)
Eggs (2)
Ground cinnamon (8 grams / 3 tsp)
White granulated sugar (38 grams / 3 tbsp)
Vanilla extract (5 grams / 1 tsp)
Baking Instructions
When you’ve got all your ingredients, it’s time to start baking! Before you get into the actual baking, though, make sure you do all the preparation first:
Important Preparations
Make sure to preheat your oven so that it has reached the desired temperature (400 degrees Fahrenheit) by the time your cookies are ready for baking.
Remove your butter from the refrigerator. You want it to reach room temperature so that it’s not too firm when you cream it with the sugar.
Sift your flour using a mesh colander, or a flour sifter if you have one. You’ll need two bowls for this. Sift from bowl to bowl as many times as necessary to get light, powdery, lump-free flour.
Measure out all of your ingredients. Ideally, weigh them out using a digital scale for accuracy.
Make Your Cookie Dough
Once all your ingredients are weighed out, your oven is preheating, and your butter has reached room temperature, you can get started on making the cookie dough. Here’s how to do it, step by step:
Add the larger quantity of sugar and butter to a bowl and use an electric mixer to cream the ingredients together. At first, the mixture will have a sandy consistency, but by the time you’re done mixing (this should not take longer than 3 minutes), it should be thick and creamy. You could also mix the butter and sugar by hand, but it will take significantly longer and your arm will get tired.
Next, crack the cold eggs into the creamed sugar and butter, and add the vanilla extract. Use the lowest speed setting on your mixer to combine all the ingredients.
Add all your pre-weighed dry ingredients into a bowl and transfer them all into the wet ingredients at the same time. Again, use a low speed to mix the flour and other dry ingredients into the wet ingredients. You may end up with some residual dry ingredients around the side of the mixing bowl, in which case, you can just use a spatula to fold it in.
Mix Your Coating
Take the smaller quantity of white granulated sugar and your cinnamon and use a spoon to combine these ingredients thoroughly in a small mixing bowl. This will be the coating for your snickerdoodle cookies.
Next, in preparation for putting your cookies onto your baking tray, line the tray with parchment paper. Alternatively, get out your silicone baking mat.
Shape And Coat The Cookies
We have found that the best way to divide your cookie dough into evenly-sized cookies is to use a muffin scoop measuring around 2 tablespoons. Use this scoop to scoop out balls of dough.
Before placing each dough ball onto your baking sheet or mat, dip it in the cinnamon sugar mixture, making sure it’s thoroughly coated. The best way to do this is to roll it through the mixture so that it’s coated on all sides.
Once the dough ball is totally covered in cinnamon sugar, place it on the baking tray.
Do the same with the rest of the cookie dough, making sure to leave about 2 inches of space between each dough ball. That’s because the cookies will spread out as they bake, so you don’t want them to end up stuck together.
Bake And Cool
Put the baking tray into your pre-heated oven and allow 8 to 10 minutes for baking.
Check on the cookies through the oven door (avoid opening the oven if possible) to see whether the edges have set. Once the edges look set, but the middles seem not-quite-done (but not doughy), you can remove them from the oven.
Take the tray out of the oven and set it on a cooling rack. Leave the cookies for 5 minutes before taking them off the tray to allow the residual heat to finish the baking process.
Move the cookies off the baking sheet and place them gently on the cooling rack.
Allow your snickerdoodles to cool down fully. This could take anywhere from half an hour to a full hour, depending on how warm it is in your kitchen.
You could eat your snickerdoodles as soon as they have cooled down, but we personally recommend placing them in an airtight container for around 2 hours, or freezing them overnight before consuming. This helps to make them chewier and softer.
Freezing And Serving Your Snickerdoodles
If you would like to freeze your snickerdoodles before eating them, wait for them to cool down fully and then create stacks. Each stack of cookies should have around 3 or 4 cookies.
Wrap each individual column twice in plastic wrap, and transfer them to an airtight container. Then, put them in the freezer. Freezing them overnight is fine, but you can also leave them there for a few days.
Before serving your snickerdoodles, allow a few hours for them to thaw out completely. They need to reach room temperature before you eat them.
These delicious cookies can be enjoyed by themselves. However, they can also be enhanced by serving them alongside a delicious beverage.
A glass of cold milk tastes great with snickerdoodles, for example. If you’re vegan, you can substitute milk for oat milk or almond milk. Chocolate milk is especially delicious.
We’ve also tried these snickerdoodles with a mug of hot chocolate, and we definitely recommend this when the weather is cold.
Tips And Tricks For Snickerdoodles Without Cream Of Tartar
Weigh (Don’t Measure) Your Ingredients
Measuring your ingredients by volume can lead to small inaccuracies, which can have a bigger impact on the flavor and texture of your snickerdoodles than you might think.
Because of this, we highly recommend buying some accurate digital scales and weighing out all of your ingredients. Digital scales are not expensive, but they’re far more accurate than using cups and scoops to measure your ingredients.
Always Sift Flour First
Lumpy flour does not make for great cookies, so when making snickerdoodles, it’s best to sift the flour between two different bowls until it’s as smooth as possible. This is the best way to ensure that your flour is soft and fluffy.
Now, you can sift the flour as many times as you like. Around 5 times tends to be optimal in our experience, but even sifting your flour 3 times can make a massive difference to the overall texture of the cookies.
Plus, it doesn’t take as long as you think. You could have perfectly-sifted flour in a matter of minutes.
Use A Calibrated Oven
You might never have thought about calibrating your oven before, but if you love to bake, this is something we highly recommend doing.
You can calibrate your oven using a simple oven thermometer to determine the difference between the indicated temperature and the actual temperature inside the oven.
Using this information, you can then calibrate your oven to make the temperature as accurate as possible. This will help to ensure that you don’t over-bake or under-bake your snickerdoodles, which is key if you want to get that perfect texture.
Double-Check Your Sugar Cinnamon Ratio
The best cinnamon-to-sugar ratio for snickerdoodles is 1 part cinnamon to 3 parts sugar, so 1:3. These ingredients are best measured in teaspoons. You should use a teaspoon of cinnamon for every 3 teaspoons, or tablespoon, of sugar.
It’s important not to add too much cinnamon in with the sugar, because this can be overwhelming. You want to be able to taste the cinnamon, but not feel that it’s overpowering.
Bake With Cold Eggs And Butter
Making sure that your eggs and butter are cold from the refrigerator when you mix them with the other ingredients is important for the texture of your snickerdoodle cookies.
You want to prevent the cookies from spreading out too much when baking. If the cookies spread more than they should, they will be too flat, and you may end up with cookies stuck together on your baking sheet.
It’s best not to remove the eggs and butter from the refrigerator until it’s almost time to use them. However, if you have taken these ingredients out of the refrigerator and find that they have become warm, you can always put them back in for a little while until they cool down again.
Use A Baking Sheet Or Parchment
You might have previously heard advice regarding greasing your baking pan with butter to stop cookies from sticking.
While this often does work, there are better ways to stop your cookies from getting stuck without using up any of your butter, or giving the cookies too much of a buttery flavor on the underside.
We recommend lining your baking tray with baking parchment or, alternatively, using a silicone baking sheet.
Using a non-silicone baking sheet means that you’ll have to transfer your cookies onto a cooling rack quite quickly. You have about 3 minutes to transfer your cookies from a regular baking sheet before they begin to stick.
Avoid Over-Baking
If you take your cookies out of the oven too soon, you can always put them back in for a few minutes. However, if you leave the snickerdoodles in the oven for too long, you might do unfixable damage to their texture.
Over-baking your snickerdoodles will dry them out. Ideally, you should bake them until the edges have set, but the inside of the cookie is still soft. Note that soft does not mean ‘doughy’. The outside of the cookie should look golden brown.
Allow For Cooling Before Eating
Allowing your snickerdoodles to cool down before you start snacking might take a lot of self-control, but it’s the option we recommend if you want to enjoy these cookies at their best.
The baking time we have specified for these snickerdoodle cookies takes into account that even after you take the cookies out of the oven, they will continue to cook on the inside. How, you ask?
This is a concept called residual baking. The heat radiating off the pan will continue to cook the cookies even once they’re out of the direct heat of the oven.
If you’re able to wait even longer, we recommend allowing the cookies to cool down before freezing them for a day and allowing them to thaw at room temperature. This enhances the fluffiness and chewiness of the cookie, and in our opinion, it’s the best way to enjoy snickerdoodles.
Full Recipe for Baking Powder Snickerdoodles
Nutritional Information
Per serving, these snickerdoodle cookies contain:
Energy (Kcal): 128
Carbohydrates: 3 g
Sugar: 1 g
Fiber: 0 g
Fat: 10 g
Saturated fat: 3 g
Unsaturated fat: 2 g
Trans fat: 0 g
Sodium: 48 mg
Cholesterol: 24 mg
Protein: 1 g
Snickerdoodle Ingredients
All-purpose flour (3 cups, 1 tbsp / 396 grams)
White granulated sugar (1 ⅔ cups / 330 grams)
Unsalted butter (1 cup / 227 grams)
Baking powder (1 tsp / 4 grams)
Eggs (2)
Vanilla extract (1 tsp / 5 grams)
Table salt (½ tsp / 3 grams)
Ground cinnamon (3 tsp / 8 grams)
White granulated sugar (3 tbsp / 38 grams)
Instructions For Snickerdoodles
Make sure your oven is preheating to 400 degrees Fahrenheit before you start
Sift your flour between 2 mixing bowls using a mesh colander or flour sifter. Repeat between 3 and 6 times
Use a digital scale to weigh out your ingredients. Avoid using volume measurements for accuracy, if possible
Combine the salt and baking powder with your sifted flour
Take a different bowl and use an electric mixer turned up to a high setting to cream the butter and sugar. Mix for up to 3 minutes until the butter is creamy.
Add the eggs and vanilla to the butter and sugar mixture. Use a medium setting on your electric mixer to combine all of the ingredients thoroughly. This should take around 20 seconds.
Pour your dry ingredient mix into the wet ingredients. You can turn your mixer to a low setting at this point, ensuring that all the flour is combined into the wet ingredients. Use a spatula to fold any excess flour around the edges of the bowl into the wet ingredients.
In a new bowl, combine the sugar and cinnamon to make the coating for the cookies. Make sure the ingredients are thoroughly combined so that there are no areas with cinnamon and no sugar, or vice versa.
Line a baking sheet with parchment paper, or get out your silicone baking mat.
Use a cookie scoop or muffin scoop (roughly 2 tbsp) to scoop up a ball of the cookie dough.
Roll the dough ball through the sugar and cinnamon mixture until it’s fully coated in the cinnamon sugar.
Place the coated dough ball on the baking sheet and repeat the last two steps with the rest of the dough. Make sure to leave 2 inches of space between each dough ball, as they will all spread out a little during the baking process.
Put your cookies in the oven and allow them to bake for between 8 and 10 minutes. Around the 6-minute point, it might be a good idea to turn the sheet around to ensure even baking.
When the edges of the snickerdoodles have set, while the middle looks almost done, you can take the cookies out of the oven.
Place the baking sheet on a cooling rack and leave it there for 5 minutes. This will allow the residual heat from the baking sheet to finish baking the cookies.
After 5 minutes, move the cookies off the baking sheet and onto the cooling rack. They should take between 30 minutes and 1 hour to cool down fully.
If you choose to, you can now rest your cookies. This involves storing them in an airtight container at room temperature for between 1 and 3 hours or, alternatively, freezing them in an airtight container overnight.
Note: To freeze your cookies, let them cool down completely and stack them into pillars of 3 or 4. Wrap each pillar in plastic wrap before transferring all the cookies into an airtight container. It’s best to freeze them for at least 24 hours, although they can withstand frozen temperatures for several days. Make sure to take the cookies out of the freezer a few hours before you want to serve them so that they have time to thaw. Don’t unwrap them until they have reached room temperature.
If you have frozen your cookies, allow them to thaw at room temperature before you eat them. They are delicious when served with cold milk or hot chocolate.
Frequently Asked Questions
What Substitutes Can I Use for Cream Of Tartar?
We think that the best substitute for cream of tartar is baking powder, which is why we’ve recommended using it in this recipe.
However, there are also options. Lemon juice is sometimes used as a substitute for cream of tartar because it’s acidic, but the problem is that it’s liquid, so it can affect the consistency of baked goods.
If you want to get the same leavening effect as cream of tartar and baking soda without compromising the texture of your cookies, it’s best to stick with baking powder.
Do I Have to Rest My Snickerdoodles Before Eating Them?
It’s not strictly necessary to rest your snickerdoodles before eating them. You can technically eat them as soon as they’re cool enough not to burn you. However, we highly recommend at least allowing them to sit for between 30 and 60 minutes to allow for residual baking.
Freezing the cookies before eating them is entirely optional. We do prefer the texture after they’ve been frozen, but as long as you let them sit for a minimum of half an hour, the snickerdoodles should still be soft and chewy inside without being under-baked.
What if I Don’t Have a Cookie Scoop?
A 2-inch cookie scoop is ideal for creating uniform cookies that are all the perfect size. With that said, if you don’t have one of these scoops, you can try other methods.
Of course, you could try assessing the size of each dough ball by eye, but this is likely to be less accurate. Still, as long as you’re careful, your cookies should turn out roughly the same size.
Alternatively, if you have a large, round cookie cutter, you can try rolling out the dough and cutting out circles of dough, which you would then roll into balls.
At the end of the day, the most important thing is that your cookies are made up of enough dough that they don’t bake all the way through during the baking time, and that they are evenly spaced with at least 2 inches between them on the baking sheet.
What Temperature Should Eggs Be for Snickerdoodles?
Ideally, when making snickerdoodles, your eggs should still be cold from the refrigerator. It’s best not to remove the eggs from your refrigerator until you need to use them. This will ensure that they’re as cool as possible.
Can I Make Snickerdoodles Vegan?
Yes, you can make snickerdoodles vegan. You’ll need to use a vegan butter instead of dairy butter, and you’ll need to either find a vegan egg replacement or substitute the eggs with oil.
Bear in mind that since cold eggs work best for snickerdoodles, the texture may be different when you use oil, and depending on the oil you use, you might end up with a slightly vegetal flavor.
It’s best to use an oil that does not have a strong flavor, such as canola oil, to avoid altering the flavor of your snickerdoodles. With that said, vegetable oil tends to produce the best results in terms of moisture, so this is up to you.
Can I Bake Gluten-Free Snickerdoodles?
You can use gluten-free flour to make these snickerdoodles vegan. Most baking powder these days is gluten-free, although we recommend double-checking this information in case the starch used happens to contain gluten. Other than that, you can keep the recipe the same.
Again, you may find that using gluten-free flour alters the texture of your snickerdoodles. The best thing to do is try out the recipe with different gluten-free flour brands to see which one produces the best crumb.
Final Thoughts
This amazing recipe goes to show that you don’t have to use cream of tartar when making snickerdoodles!
Instead of baking soda and cream of tartar, you can use baking powder to help the cookies rise. While the tangy aftertaste of cream of tartar will not come through, the texture should be very much the same, and the new cinnamon sugar cookie flavor is absolutely delicious.
Remember to use only cold butter and eggs for your snickerdoodles, and if possible, allow the cookies to rest before eating them, either for a few hours at room temperature or 24 hours in the freezer.
Have you ever made something so delicious that you wished you could savor it forever?
Only to find that the recipe has now mysteriously vanished from your phone and the entirety of the internet. Yep, there’s not much more painful than that.
Hi, my name is Mark Williams and I have been infatuated with cooking since I was young. I would beg my mother to pull a chair up to the counter so I could watch what she was doing.