Best of all, there are only five easy steps that you need to follow! Anyone should be able to make a delicious soft and fluffy loaf of this tasty sandwich bread.
With that said, let us get started!
What Ingredients Are You Going To Need?
To get things off to a good start, you are inevitably going to need the right ingredients to make your bread. Below we have listed all six ingredients and the quantities for you:
Flour – You will need exactly two cups and a three quarter cup of flour.
Instant Yeast – You will need one teaspoon of instant yeast.
Warm Water – You will need one cup and two teaspoons of warm water.
Vegetable Oil – You will need one tablespoon of vegetable oil.
Sugar – You are going to need one tablespoon of sugar.
Salt – You will need one teaspoon of salt.
With these ingredients on hand, all you need are the instructions to tell you how to use them. Luckily we have you covered! Let’s find out how to make your bread in the next section!
Step-By-Step Instructions For Dairy Free Bread
At this point you should have all of the ingredients in the right quantities we have specified in the section above.
Now you need to check out what to do with your ingredients and that is what we are going to cover in this section.
1. Get Your Bread Dough Ready
To get your dough ready, you need to start off by adding water, sugar, salt, and yeast into a bowl. Allow all your ingredients to dissolve in the water before you move on.
Once you are satisfied that the sugar, salt and yeast have dissolved, you will need to add the oil and flour into the mix. Stir thoroughly until everything is properly combined and you have a mass of dough.
Clean a space on a table or your kitchen counter and then pour your dough out and start kneading it. By doing this you are helping the dough to develop gluten strands which will make it easier to create a loaf of bread that is light, airy and soft.
You can knead using your hands or a stand mixer if you prefer. For the stand mixer you just need to make sure that you have the hook attachment to get the best results.
You will need to allow it to mix for about ten minutes on a low speed to get the perfect dough.
You will know that your dough is ready for the next step once it passes the window pane test. If you are not sure what the window pane test is let us tell you. This test is one of the best methods to tell you if you have properly kneaded your dough properly.
What you need to do is stretch your dough out so that there is just a thin membrane. If you are able to do this without the membrane breaking, you know that your dough is properly developed and ready to be turned into bread.
If you happen to get tired while you are kneading you can easily take a quick ten-minute break. Just make sure to cover the dough while you are resting.
By doing this you can rest your hands and put more energy into kneading your dough to the level that it needs to be.
After about ten to twelve minutes of kneading your dough should have a soft and smooth texture. When you press the dough it should bounce back and it can be a bit tacky.
With that your dough should be ready for proofing.
2. Start The Process Of Proofing
Now it is time for you to proof your dough. To start you will need to pour just a little oil in a clean bowl and coat it thoroughly. Place your dough in the bowl and place plastic wrap over the top of the bowl.
Now simply set your dough aside and allow it to rise in a warm spot for about fifty minutes. You will have the option to double proof your bread dough but you do not need to if you do not have the time to do so.
3. Get Your Dough Shaped Properly
Your dough should have puffed up quite nicely after it has been proofed. Now you get to shape the dough but first you need to get rid of the gas. You can do this by simply putting your hand in the dough to release the air.
Now you will need to take your dough out of your bowl and place it on a clean work surface.
Separate your dough into two equal sections, but only if you do not want to make a single loaf of bread. Regardless of how many sections you separate your dough into, the next step is to roll the dough into a long thin shape.
Once you have done that, cover the thin strip of dough with plastic wrap and allow it to sit for about ten minutes before you move on.
Once ten minutes have passed, grab your rolling pin and roll your dough out into a rectangle. Then you will need to fold your dough from both sides before you flatten your dough into a long rectangle again. Ensure that there are no air pockets inside the dough.
On the other side your dough will be full of holes. Roll your dough so just like you would do if you were enjoying a jelly roll.
Pinch the edges of the dough so that it is properly sealed and then place your neatly rolled dough in the baking pan that you are using. Make sure that your baking pan has been properly greased before you do this however.
At this point, your bread dough should be ready for the final rising. As such you are going to need to cover the baking tin with plastic wrap before leaving it to rise.
4. Settle In For The Final Rising Period
Your dough will not need to be placed in a nice warm place so that it can rise. You need to leave the dough to rise for between seventy and seventy-five minutes.
Before you throw your dough into the oven, you should brush on an egg wash. You do not need to do this but it will make your bread look extra shiny and brown in color.
5. It Is Time To Bake The Bread
Preheat your oven to about 350 degrees Fahrenheit. Allow the oven to heat up for between thirty-six and thirty-eight minutes before you put your bread in the oven.
After approximately twenty-five minutes of baking, this does not mean that your bread has finished baking.
As such you need to allow your bread to bake for between thirty-six and thirty-eight minutes as we have stated.
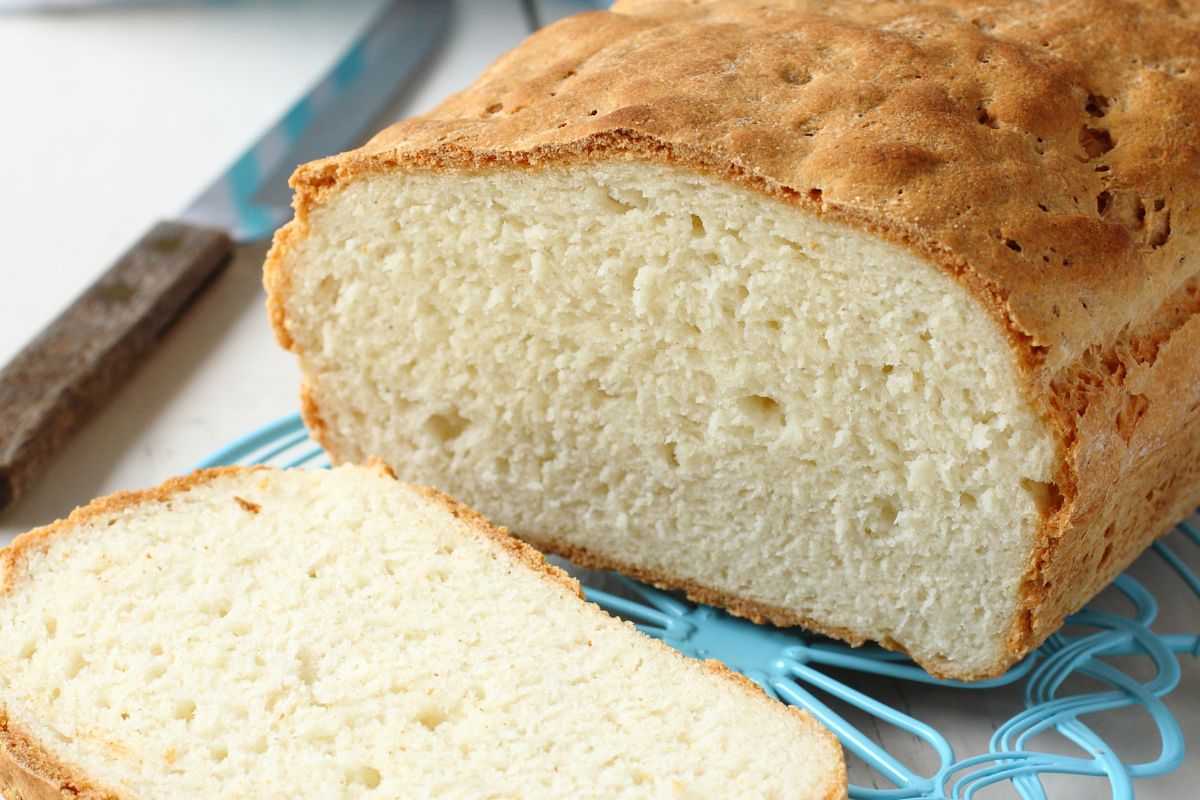
Once this time has elapsed you should take your bread out of the oven. Take the bread out of the mold and place it on a wire rack so that it can cool down properly. Only once it is cool should you slice your bread.
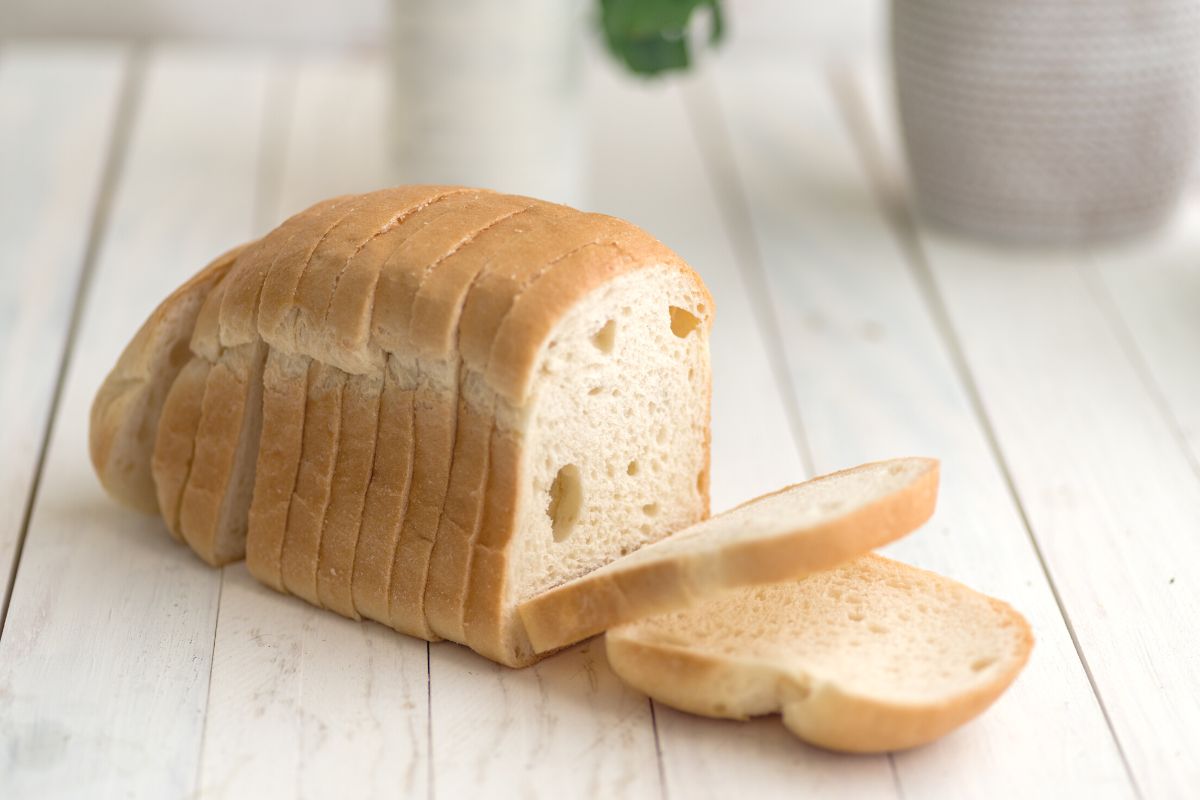
Your bread should have a lovely golden brown color and the interior should be amazingly soft and fluffy. You will certainly love a bit of butter or jam on this bread. Alternatively….you could make a sandwich with it.
How Do You Know Your Bread Is Done?
It is no secret that most ovens will bake at different rates which can make it hard to know if your bread is done or not. Luckily for you, we know a few tips on how to tell if your bread has finished baking.
Check out our list of tips to tell if your bread is done below:
1. The Look
You can tell a lot about whether your bread is properly baked by just looking at it. Your loaf of bread should have a lovely golden brown color on all sides and not just the top.
If you notice that not all sides are this color it may be that your bread has not cooked through. So, put it back in the oven for maybe five more minutes.
2. The Internal Temperature
This is an easy way to tell if your bread is done. Simply insert a thermometer into the middle of your bread loaf. You will know that this bread is done when it has an internal temperature of two-hundred degrees Fahrenheit.
If you notice that the temperature is too low, simply put your bread back in the oven for a little while longer until it is cooked. An extra five minutes will certainly fix this issue, the worst that could happen would be your bread being a little dryer than you would like.
3. Baked Bread Sounds Hollow
Another easy method to use is to simply tap on the bottom of the bread loaf. You are listening for a hollow sound. If your bread sounds hollow then you will know that it has baked through.
If you are still having issues with your bread being over or under baked, it may be a good idea to turn your attention to the oven. Your temperature may be off or there may be an issue with the device which causes uneven baking.
What Is The Best Way To Store This Type Of Bread?
Bread that is dairy free can be stored in a few ways. The most common one is to simply store it in a dry place at room temperature. Your bread will only last for about two to three days, so make sure to eat it before it starts to mold.
Take care if your climate is humid as this can cause your bread to mold faster. You can also keep your bread in the refrigerator, it will last for a little longer this way. The main issue is that it can dry out a little more this way.
Is Freezing Dairy-Free Bread A Good Idea?
Yes! It is actually quite easy to freeze dairy-free bread. All you need to do is wrap it up in aluminum foil so that it does not get freezer burn. Your bread will last much longer this way too!
So you can enjoy your fresh homemade bread for up to one month using this method. When you are craving a slice of bread, all you need to do is cut off a slice and pop it in the toaster.
After just a few minutes your bread will be defrosted and you can enjoy it with whatever condiment you like!
What Is Making Your Dairy-Free Bread So Dense And Heavy?
Is your bread coming out the oven too dense and heavy? There are a few reasons why this could be happening. We have listed them below for you to consider:
Rising or Short Rising – If your bread is dense and heavy it may be that it has been rising for too long or too short. If your yeast has not had time to create bubbles and carbon dioxide it can cause your bread to be too dense. Bread that has been cruising for too long will collapse onto itself which can have a similar effect.
Yeast is Inactive – If your yeast is not active then you may find that using a different yeast will get you better results.
The Flour Does Not Have Gluten – Dough will not hold its shape well if there is not enough gluten in the flour. This issue occurs most when whole grains such as whole wheat flour is used. It might be a good idea for you to use bread flour into the mix. Alternatively you could add vital wheat gluten to the dough.
It Was Too Hot or Cold During Rising – Yeast will develop at its best when it is about one hundred degrees Fahrenheit. If the temperature is off it can cause the yeast to work slower than you expect.
Bear these tips in mind and you may find that your bread will not turn out so dense and heavy.
What Causes Bread To Not Cook In The Center?
If your bread is coming out of the oven with the center uncooked. While the exterior may look golden brown and delicious, the interior may be uncooked. But, why is this happening? Well, there are a few reasons. We have listed them below:
Oven Too Hot at the Start – If your oven is too warm when you first put your bread in it can cause the crust to cook faster than the inside. Also the inside may not be able to expand as it should, which can make the texture a little strange and not cook as it should.
Removed Too Quickly – If you take your bread out of the oven too quickly just because it looks done can mean that your bread will come out not properly baked. So, make sure to leave your bread in the oven as long as it is supposed to be regardless of how done it looks.
Bear these two tips in mind and your bread should come out perfectly baked.
What Can Make Dairy-Free Bread Collapse?
If your bread has been over proofed it can cause your bread to become structurally weak. When this happens it can result in your bread collapsing.
If you are using the second rising method, and you leave it longer than it should, it can cause the gluten to expand higher than it should.
When this happens the starch can become gelatinous, and the proteins to coagulate. This can cause your gluten strands to curl up and create weak links. As this happens the bread will lose its structural integrity and it will collapse.
What Can Cause Dairy-Free Bread Not To Rise?
Is your bread refusing to rise as it should? There are a few reasons why this might be happening and we have listed them below for you to check out:
Proofing the Yeast – Your yeast will need to be proofed before you use it or bake the bread.
Temperature of Water – The water temperature needs to be correct before the yeast is dissolved. The perfect temperature is about 110 degrees Fahrenheit.
Salt Added to Yeast – it is not a good idea for the salt to be added to the yeast directly as it is thought to kill it before it can do its work.
Excessive Flour – If your dough gets too stiff it can be the result of too much flour in the mix. If your dough does not end up soft, smooth and slightly tacky after it has been kneaded it can be a sign you have added too much flour.
As long as you are careful to follow these four rules, there is no reason why your bread should not rise as it should.
What Is The Best Way To Reheat Dairy-Free Bread?
If you fancy preheating your dairy-free bread, there is one way that works best above all. We have listed instructions below for you to follow:
Heat Your Oven – To start you are going to need your oven preheated to about 350 degrees Fahrenheit. This is the best temperature for warming up bread. If you put it on too hot it can cause the bread to burn. Lower temperatures will cause the bread to stay nice and soft with a mildly chewy crust.
Spray Water on the Bread – Spray some water on the bread and cover the bread with aluminum foil. This will stop the bread drying out while still allowing it to warm through.
Bake the Bread – Your bread should not be placed in the oven and allowed to bake for about ten minutes. If your loaf of bread is particularly large it may take about five minutes longer.
Steam the Bread – Are you keen to keep your bread moist and chewy? If so then you may find that steaming it will bring out the best once it has been heated through in the oven.
Toast the Bread – At this point you can toast your bread or simply enjoy a bit of butter on it before it is consumed.
With these simple steps you should easily warm up your delicious homemade bread without any issue at all.
What Can Cause Your Bread To Smell Strongly Of Yeast?
Does your bread exude a strong yeasty smell? Why is this happening? Find out below:
Bread Dough Rose for Too Long – Do not allow your dough to rise for longer than it takes for the dough to double in size.
Not Enough Baking Time – If you have not baked your bread for long enough it can be that your bread will have a strong yeast smell.
Not Enough Kneading – If you have not kneaded your dough for long enough it can cause the bread to have a yeasty scent.
Too Much Yeast – If you add too much yeast your bread will inevitably smell strongly of yeast.
Bear these tips in mind and your bread will not have a strong yeasty scent when you cut it open or take it out of the oven.
What Causes Dairy-Free Bread Crust To Be Too Thick?
If your bread has a thick crust, it can make the bread a bit unpleasant to eat. Below are a few reasons why this could be happening:
Wrong Consistency – If you have kneaded your dough and the consistency is not tacky, then you may find that your bread crust will be too thick.
Low Oven Temperature – If your oven temperature is too low it can mean that your bread will bake for longer which can lead to the crust becoming thicker.
As long as you are careful about these two tips, you should have a perfectly thick crust.
Final Thoughts
We hope that you have enjoyed reading this article and learning about how you can make the perfect loaf of dairy-free sandwich bread.
It really is so easy to do. Even an amateur baker should be able to whip up this delicious dairy-free bread without any issue at all.
As long as you keep everything we have mentioned here in mind, you should not have any issue whipping up a loaf of this fluffy and light bread.
If you have enjoyed reading this article, we hope that you will take a moment to check out our website. We have a range of articles there which you are bound to find interesting or even useful.
Have you ever made something so delicious that you wished you could savor it forever?
Only to find that the recipe has now mysteriously vanished from your phone and the entirety of the internet. Yep, there’s not much more painful than that.
Hi, my name is Mark Williams and I have been infatuated with cooking since I was young. I would beg my mother to pull a chair up to the counter so I could watch what she was doing.