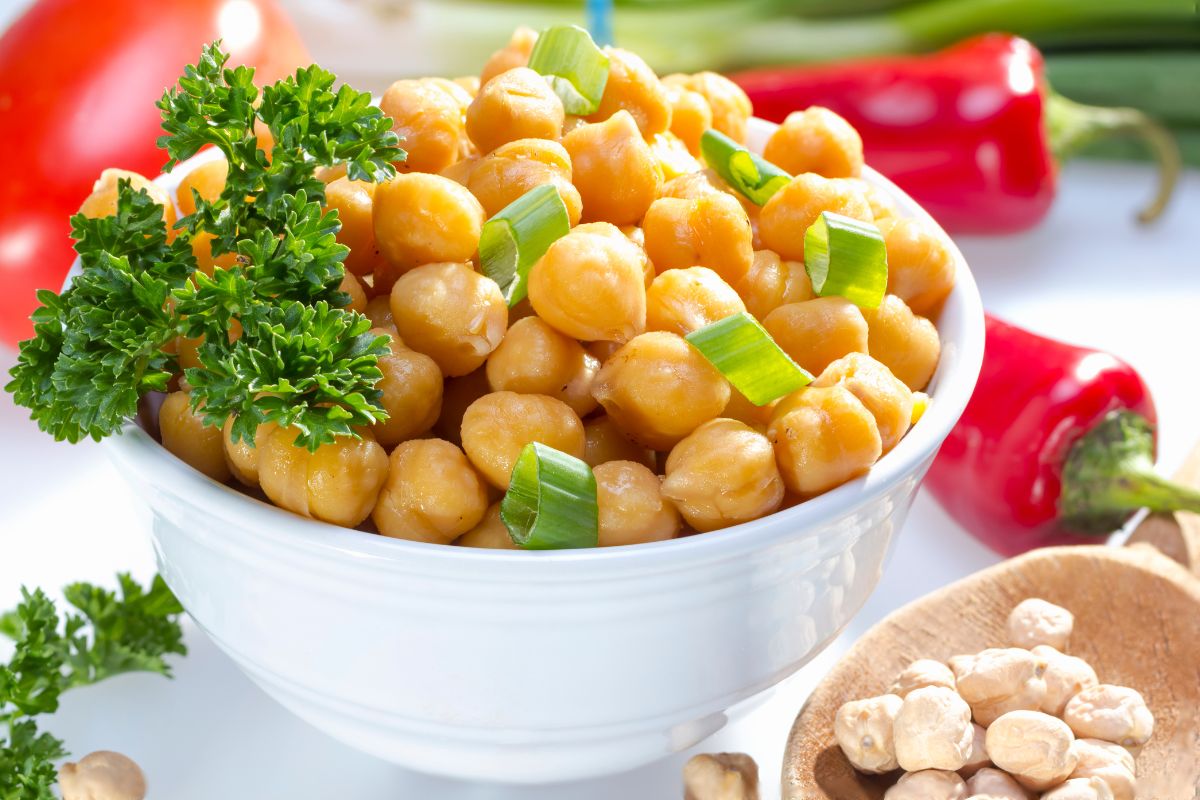
They’re great for those following a vegetarian or vegan diet, as they work really well as a meat replacement for dishes such as pies and curries.
They’re also great for those out there who are looking to drop a few extra pounds, as they’re super low in calories too.
If you’re new to the process of soaking and cooking your own garbanzo beans, then let us tell you that it’s absolutely worth it. They’re not only more flavorful, but they’re also packed with more nutrients too.
Although the process might seem arduous, we can guarantee that you’ll be pleased with the result.
Below, we’ve compiled this handy guide that will help you to get started with cooking your own soft and creamy garbanzo beans, providing lots of tips and tricks along the way.
If you want to find out more, simply keep reading below, as we take a closer look.
What Are Garbanzo Beans?
So before we jump straight in, and start a look at our recipe, first, let’s cover what garbanzo beans really are for those of you who don’t don’t know.
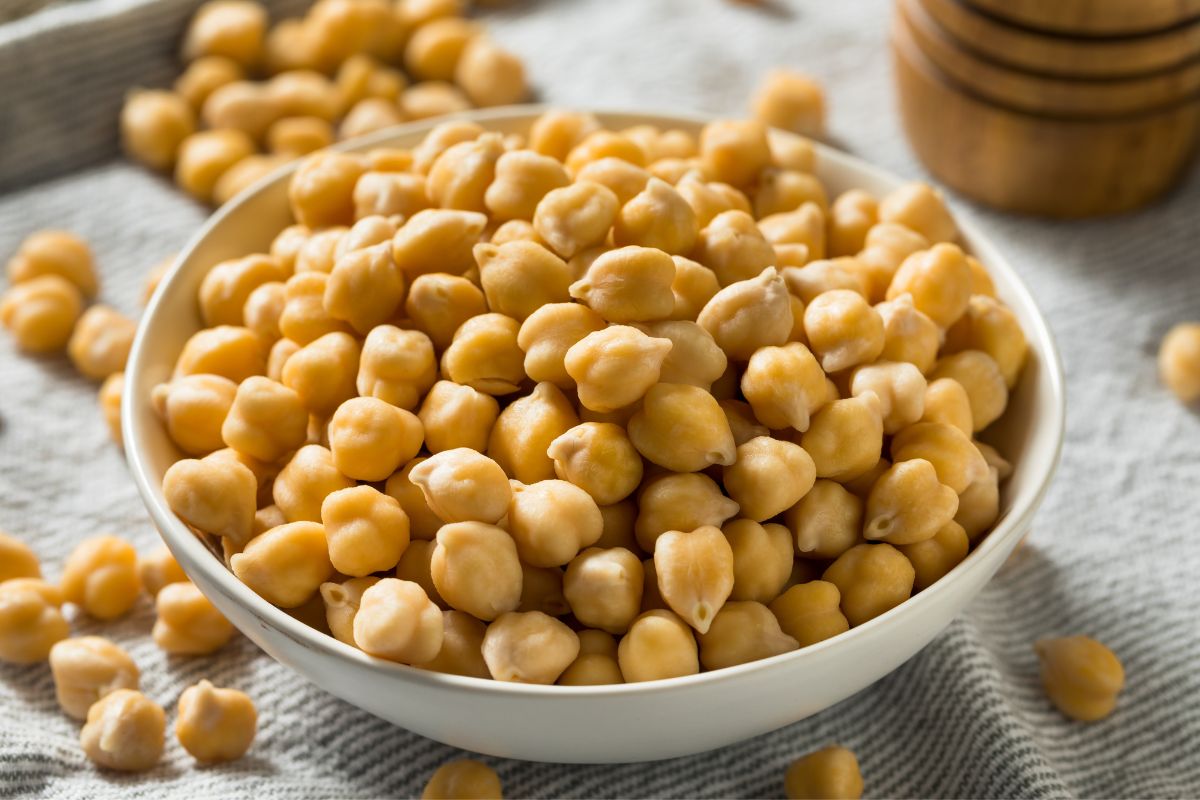
Some of you may have tried garbanzo beans without even realizing it, because they often go by another name. You might find these beans in your local grocery store, termed as ‘chickpeas’ instead.
They’re both the same thing, and in this article, we’re going to be using the names interchangeably.
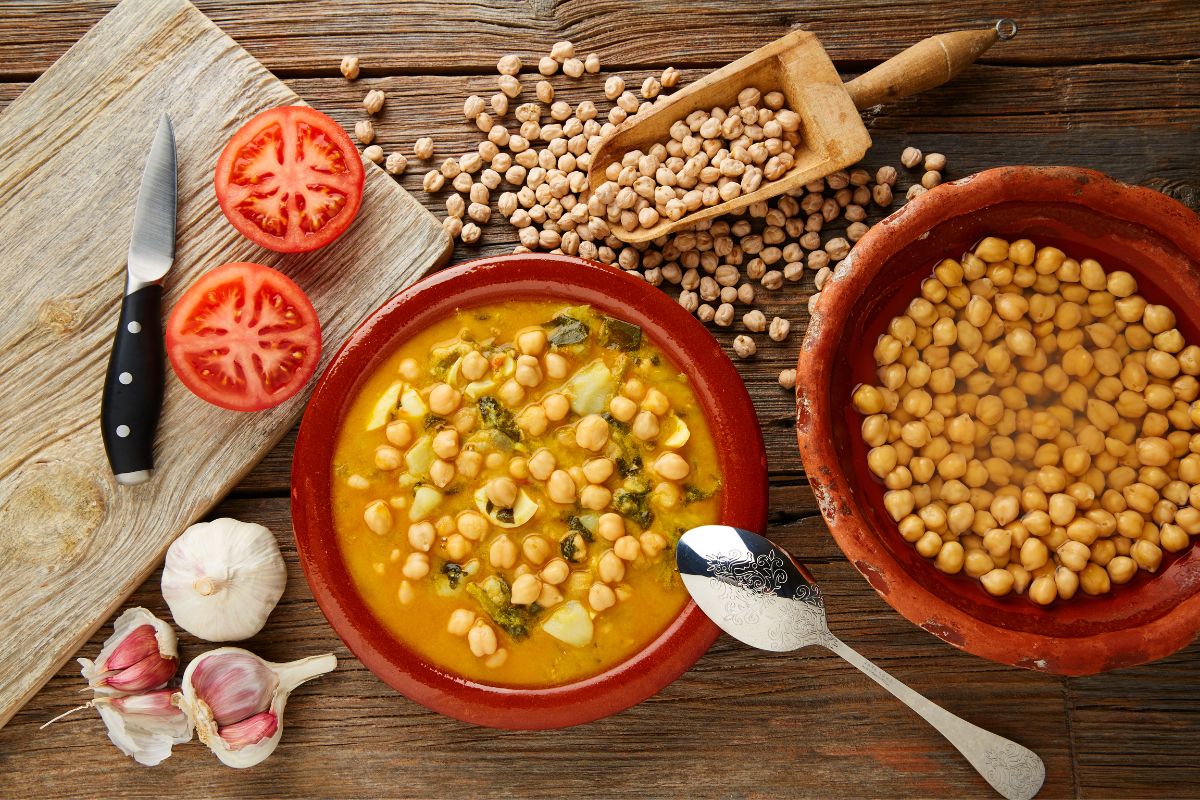
As we mentioned above, garbanzo beans cooked from scratch will taste a whole lot better. For dishes such as hummus, we’d always recommend cooking your own beans from scratch, as they really stand out in this recipe.
In terms of flavor, chickpeas have a mild, nutty flavor, with a very strong earthy taste. They’re mild enough that you can put them in a variety of different dishes, without them overpowering the other ingredients involved.
There are also two different types of garbanzo beans in existence, which are termed desi and kabuli.
Desi is a small, dark looking garbanzo seed, whereas kabuli is the large, rounded, light colored bean that most of us will recognize. The latter is far more easy to find in your local grocery store.
What Are Some Of The Nutritional Benefits Of Garbanzo Beans?
Now that we’ve covered what garbanzo beans really are, we can move on to discuss what nutritional benefits they provide.
More and more people are opting to use garbanzo beans in their dishes in place of meat, and the result is a far healthier and well rounded diet.
Below, we’ve compiled a list of some of the key nutritional benefits of garbanzo beans so that you can start reaping the rewards.
Weight Loss
One of the key benefits of garbanzo beans is that they may aid you with weight loss.
This is because these little morsels are packed to the brim with fiber and protein, both of which are known to be highly adept at keeping you feeling fuller for longer. They do this by slowing down the process of digestion.
This, in turn, can help to reduce your appetite overall, and as a result, prevent you from snacking throughout the day. There have even been studies that show a 70 percent reduction in appetite after consuming garbanzo beans.
Regulate Blood Sugar
Another health benefit of garbanzo beans is that they can help to regulate your blood sugar. When we eat sugary foods with empty calories, this can cause our blood sugar to spike at unhealthy levels, and as a result, we can develop cholesterol based health conditions.
Chickpeas, however, are well known as a food that helps to regulate blood sugar, and the high fiber and protein content helps to keep it at a steady level.
In several studies, chickpeas have been linked to a reduced risk of developing serious conditions such as heart disease and diabetes.
Good For Digestion
Another health benefit provided by chickpeas is that they’re super good for your digestion. As we all know, fiber is a key component for healthy digestive functions, and their high fiber content helps to facilitate this process.
Because they’re super soluble in your stomach, this means they form a gel-like substance when mixed with water in your gut.
As a result, more healthy bacteria is able to grow, and can in turn, prevent the onset of conditions such as irritable bowel syndrome, and even some forms of cancer.
Chickpeas will help to regulate your bowel movements, and if you suffer from constipation, you may benefit from eating these beans on a regular basis.
Prevention Against Disease
As we’ve already briefly mentioned, garbanzo beans are important in terms of reducing the risk of developing serious conditions.
One of the key diseases that it can help to protect against is cancer. This is because chickpeas help to produce fatty acids that are responsible for reducing inflammation that’s associated with cancer.
As well as helping to protect against cancer, garbanzo beans are also adept at protecting against the development of type 2 diabetes.
As we mentioned above, garbanzo beans are highly adept at regulating blood sugar, and this can help to manage blood sugar spikes in pre diabetic individuals.
Finally, garbanzo beans also reduce your risk of developing heart disease, which is an umbrella term for a whole host of different health conditions.
This is because they contain lots of magnesium and potassium, which are known for aiding heart health, and reducing blood pressure.
They can also help to lower the amount of bad cholesterol already present in your body.
Good For The Brain
Garbanzo beans are also known for being good for brain function. Because they have a high choline content, this helps to produce a number of different neurotransmitters.
This is especially good for teenagers and children who are still developing, as they support brain development.
Because they’re packed with nutrients such as zinc, selenium, and magnesium, these nutrients are also known for being able to reduce the symptoms of serious mental health conditions such as anxiety and depression.
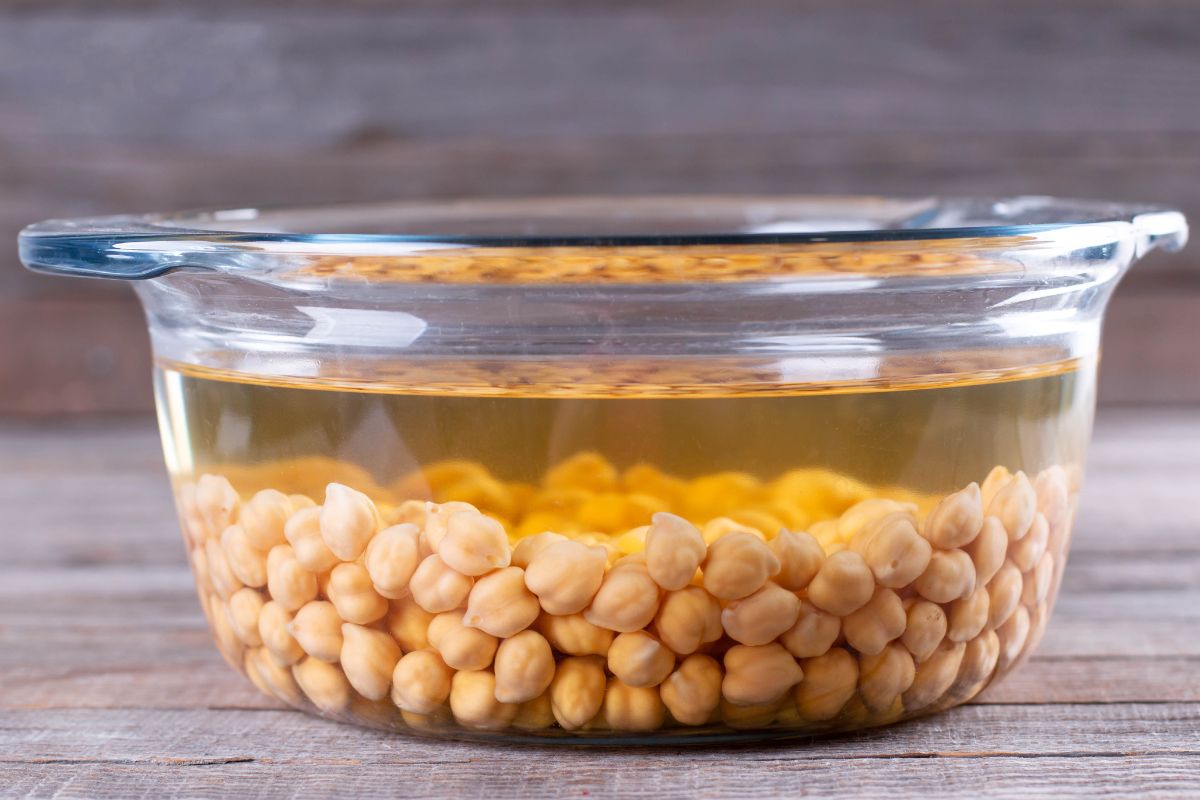
Soaking Garbanzo Beans
Now, before we jump into the process of cooking garbanzo beans, first we’re going to be soaking them. Why? We hear you ask. Can’t you just cook your garbanzo beans immediately, without the hassle of soaking them first?
Well, yes, of course you can, but they just won’t taste as good. Soaking the beans beforehand will ensure that they have that creamy, soft texture that you’re looking for.
It also makes the cooking process a whole lot easier, because soaking your beans beforehand means that you’re reducing the amount of time they take to cook. Therefore, you can simply soak your beans the previous evening, ready to cook for the next day.
Finally, if you soak your beans beforehand, you’re also a whole lot less likely to bloat after eating them. Failing to soak your beans can give you some unpleasant symptoms, such as flatulence.
What Should I Soak My Beans In?
Now that we’ve covered that you should always soak your garbanzo beans before getting started with the cooking process, we can move on to the cooking process itself. If you’re looking for the best substance to soak your beans in, we’ve got a few suggestions, and we’ll go through the merits of each below.
Soaking In Water
The first soak that we’re going to be taking a closer look at is plain old water. This is the easiest method for soaking your beans, and involves using 8 cups of water.
When the beans were soaked using this method, they still maintained their firm texture, and had a little bit of peeling in terms of the skin.
Soaking In Baking Powder
This is a formula that many chefs apply when soaking their garbanzo beans, and involves using 8 cups of water, along with approximately half a teaspoon of baking soda. You really don’t want to overdo it here.
The result of soaking your beans in baking powder and water, is that the beans will become incredibly soft upon cooking.
When you finish cooking them, you’ll notice that a lot of the skin has begun to peel off. We’d recommend using this method if you’re looking to make the beans into a paste for hummus.
In terms of taste however, these can be the most bland of the three, so you’ll need to add a little bit of salt to the beans following the cooking process.
Soaking In Salt Water
If you’re considering soaking your beans in salt water, then we’d recommend using approximately one tablespoon of salt along with your water.
If you use this method, then your beans will be at their firmest texture, this is particularly good if you’re looking to use your beans in order to make dishes such as curries, and other dishes where they need to keep their shape.
In terms of skin peeling, it still remains very firm on the bean itself, with minimum amounts of peeling.
This method also ensures that your beans are as flavorful as possible, as the salt really adds something to the taste of the beans. This makes them great for when you want them to stand out in a dish.
Method For Soaking Garbanzo Beans
As you can see from above, there’s really no set way to soak your beans, as the method that you use will depend entirely on the texture and flavor you want to achieve.
For example, if you want firmer beans that you can use within dishes where you want them to maintain their shape, then we’d recommend using either plain or salt water.
If however, you want your beans to be super creamy to use in dishes such as hummus, then we’d definitely recommend that you soak them in baking soda instead, as this yields a softer bean.
Whichever method you choose, we’ve compiled a brief guide below that you can apply to any of these. Keep reading below to find out more.
Step 1
In order to get started with soaking your garbanzo beans, first of all, you’re going to need to find a medium sized bowl that you can place them in.
Then, you can go ahead and get started with sorting through all of your garbanzo beans. You’ll notice some will have bits of debris on them, so you can go ahead and remove these before placing them to soak.
Step 2
The next step is to start the actual soaking process. In order to do this, as we mentioned above, you should seek to add about 8 cups of water to your bowl. In addition to this, you can also add in either your baking soda or salt, if need be.
After you’ve done this, you can go ahead and add in the chickpeas. This recipe will work for approximately one cup of chickpeas. If you want to make more, then you’ll need to adjust the water levels accordingly.
Step 3
The next step is to simply allow your chickpeas to soak. They will need a decent amount of time to suck up all of the water, so we’d actually recommend preparing these the night before, then leaving them until the morning.
Your chickpeas should soak for at least 7 hours. Essentially, the longer the better.
Step 4
The next thing you’re going to need to do is to drain your beans. This is really easy, and you’ll just need a regular old collider for the job.
We’d also recommend that you rinse them off a little with some running water, especially if you’ve been soaking them in soda water.
Then that’s it! You’ve successfully soaked your garbanzo beans so that they’re ready for cooking. It’s a super easy process, and most definitely worthwhile.
Cooking Your Garbanzo Beans
Now that we’ve taken a look at the method for soaking your garbanzo beans, we can move on to discuss the cooking process. Cooking your garbanzo beans is super easy, and you can use a number of different methods too.
Cooking Garbanzo Beans Using A Slow Cooker
Step 1
In order to get started with cooking your garbanzo beans using a slow cooker, the first thing that you’re going to need to do is add your beans to the cooker.
After they’re in there, you can then go ahead and add in approximately three cups of water, in order to help them achieve that super creamy consistency.
Step 2
The next step is to cook your beans. We presume that you’re using this method because you want the process to be hassle free, and leave your beans to cook for an extended period of time.
In this case, you can leave your beans to cook on a low setting for approximately 8 hours.
Step 3
The next thing that you’re going to need to do is to check on your chickpeas, and see if they have any foam that’s accumulated on the top. Scrape this foam off of the surface using a metal spoon.
After you’ve done this, you can then go ahead and drain your beans. After you’ve done this, they’re ready to go, and you can start adding them into your recipes.
Slow Cooker Method: Quality Check
This is the part where we’re going to be taking a closer look at the quality of the garbanzo beans using this cooking method. In terms of time, this is of course, the longest way of cooking your garbanzo beans.
It’s also the easiest, because you can simply leave the beans to do their magic with very little effort or hassle on your part.
In terms of the beans themselves, as you can imagine, this method yields the softest beans. So, if you’re planning on using them to make a dish such as hummus, this one is a great option.
Cooking Garbanzo Beans Using The Stovetop
Step 1
In order to get started with cooking your garbanzo beans using the stovetop, the first thing you’re going to need to do is add the beans to a pot.
After you’ve placed the beans inside the pot on your stovetop, you’re going to need to add in more water to the mix.
We’d recommend using approximately 5 cups, which means that you should choose a larger pot so that there’s enough room.
In addition to this, the beans expand during the cooking process, so you don’t want your pot to get overwhelmed.
After you’ve added in the water, then add in a tablespoon of salt for added flavor.
Step 2
After you’ve got your beans in the pot, the next thing that you’re going to want to do is to bring it all to the boil. You can quicken this process by simply placing a lid over the pot.
After this, you’re going to want to reduce the heat to a low setting, where your beans can simply simmer.
Step 3
After you’ve reduced the heat of your beans, you can leave them for approximately 80 minutes before checking on them again. They’ll need this long in order to soften.
Finally, you can go ahead and take the lid off of the pot, and skim off the top layer of foam that’s accumulated. Just like the slow cooker method, you’re going to want to drain your beans. They’re then ready to go.
Stovetop Method: Quality Check
So, what did we think of the stovetop method? Well, one of the key benefits of cooking your garbanzo beans on the stovetop, is that you can simply check on them whenever you need to, and it’s really simple to do so.
All you have to do is lift the lid off of the pot in order to see how they’re progressing.
However, this is also the most involved method, and involves you controlling the temperature of your beans yourself. In terms of how long this method takes, it sits somewhere between the pressure cooker and slow cooker method.
In terms of the beans themselves, this method yielded slightly firmer beans than the slow cooker method. This might make it a good option if you want your beans to retain their shape.
Pressure Cooker Method
Step 1
If you want to cook your garbanzo beans using a pressure cooker, then the first thing that you’re going to need to do is to add the chickpeas to the cooker.
You’re going to need to put approximately 2 cups of water in there too in order to cover the chickpeas. In addition to this, we’d recommend adding a little bit of salt to the mix for added flavor.
Step 2
You can then put your pressure cooker on, and cook the beans for approximately 15 minutes. You won’t need to leave them for any longer than this, as you could risk them becoming overly mushy.
After you’re done cooking your garbanzo beans, then you can go ahead and allow your pressure cooker to release naturally. You don’t want it to release too quickly, as this may affect the quality of your beans.
Step 3
After you’ve done this, you can go ahead and skim off the top of the foam that’s accumulated, and then you can go ahead and start draining the garbanzo beans.
They’re then ready to be added into any recipe of your choice.
Pressure Cooker Method: Quality Check
So, what did we think of using the pressure cooker as a form of cooking your beans? Well, it’s obviously the quickest way to whip up your garbanzo beans, and is great for when you don’t have much time on your hands.
By using the pressure cooker method, you’ll literally have everything ready within just 15 minutes.
In addition to this, it’s also the easiest method, because you’re not required to check on the beans at any point.
The timer will simply let you know when the beans are ready, so unlike the stovetop method, you don’t need to go checking all of the time.
In addition, as you’ll already know if you own a pressure cooker, it has an automatic warming device built in. So, you don’t need to worry about leaving your beans in there for an extended amount of time whilst you prepare your dish, as it will keep the temperature warm for you.
The only drawback of using the pressure cooker method is that you’re not able to determine whether or not the beans are ready.
Depending on the make or model of your pressure cooker, the timing may take slightly longer or shorter than intended. Therefore, you’ll have to start up the entire process again, which might be a little bit frustrating.
In terms of the beans themselves, we’d say that this method yields moderately soft beans. They’re great if you want just a little bit of firmness, but with a super creamy inner layer.
Final Thoughts
So, to sum up, cooking garbanzo beans couldn’t be easier than with this handy guide. We’d always recommend that you soak your garbanzo beans before cooking, as this will prevent them from being too hard and dry.
You can simply soak them in water, or you can add either salt or baking soda to the mix, for added flavor and texture.
When it comes to cooking your garbanzo beans, we’d recommend that you either use a slow cooker, pressure cooker, or stovetop. Depending on the consistency you want your beans to be, you can adjust the cooking method accordingly.
We sincerely hope that this guide has been helpful today, and we wish you happy cooking!
Frequently Asked Questions
Now that we’ve taken a closer look at each of the different cooking methods, and the results that they all yield, we can move on to discuss some of the frequently asked questions some of you had.
Soaking and cooking your own garbanzo beans is a new process for many people, and as a result, there’s probably lots of things that you’re curious about.
Below, we’ve compiled a list of some of the most common questions that we received regarding garbanzo beans, and these cover everything from the technical aspects of cooking, to proper storage methods.
We’d recommend that you don’t skip this part, although it might be tempting to just jump straight in and get started with cooking your beans, as it can help to provide you with some handy tips and tricks.
Do I Really Have To Leave My Beans To Soak For 8 Hours?
Some of you reading this article wondered whether or not it was necessary to leave your beans to soak for 8 hours. Sometimes, you just won’t have enough time on your hands, or you might have forgotten to leave them to soak the previous evening.
If this is the case, then don’t worry, because there is a quicker method that you can apply. In order to soak your beans at a faster rate, you’re going to need to go ahead and rinse off your chickpeas to get started.
After you’ve done this, you’re going to need to place them in a pan, where you’re going to fill it up with around 7 cups of boiling water. Bring the pan to a boil, and leave them in this state for approximately 3 minutes.
Finally, you can go ahead and drain the garbanzo beans thoroughly, before going ahead and leaving them to soak in a bowl of cold water for approximately one hour.
This is a super easy method, and will only take you a total of 1 hour and 3 minutes. Perfect for when you’re running low on time.
My Garbanzo Beans Are Still Hard, Why?
Some of you may have gone ahead and cooked your garbanzo beans, only to find that they hadn’t achieved that soft and creamy texture you were looking for.
Some of you might be wondering whether this is something that you did wrong, or it was just an issue with the beans themselves.
Well, both of these answers are true. Sometimes, your beans can remain hard after cooking, simply because you’ve not cooked them for long enough.
Another reason why they might still be hard is because they haven’t been soaked for long enough. Make sure that you’re following the steps provided above, and leaving your beans to soak for an appropriate amount of time.
Sometimes however, the reason why your beans are still hard after cooking has nothing to do with you. It’s actually to do with the quality of the beans themselves.
An interesting thing about garbanzo beans is that they can actually become hard as they begin to get old.
This doesn’t necessarily have to be a problem, but you’ll need to adjust the amount of time they take to cook, allowing approximately 10 more minutes if cooking on a stovetop.
When purchasing your garbanzo beans, make sure that they’re as fresh as possible, as this will help to ensure that they don’t take too much time to cook.
How Do I Cook Frozen Chickpeas?
Some of you reading this article might be wondering about the best way to cook frozen chickpeas. These are easily bought in the supermarket, and are great if you don’t have much time on your hands, but you still want to create a garbanzo bean recipe.
Those of you reading this article might be tempted to allow your garbanzo beans to thaw thoroughly before adding them to a dish, but we’re here to tell you that this isn’t necessary.
If you’re making a curry or a casserole, or any other liquid based dish for that matter, you don’t need to leave your chickpeas thaw beforehand.
All you have to do is stir in the frozen chickpeas to the hot mixture, and they’ll naturally thaw without any effort on your part. The only thing that you might have to do in this case is to increase the cooking time.
Because you’ve added a bulk of frozen beans into the mixture, this can cool the overall temperature of the dish.
So, if possible, turn up the heat a little, and leave to cook for around 15 minutes more. It might not take this long, so be sure to check on your beans now and then to see if they’ve softened.
Of course, none of this is applicable if you’re looking to use your chickpeas for something like hummus.
If this is the case, then we’d recommend taking your chickpeas out of the freezer the evening before, then allowing them to thaw for an extended period of time, such as overnight.
What Does Aquafaba Mean?
If you’ve been researching all things garbanzo bean, then chances are that during your browsing history, you came across the word ‘aquafaba’, at least once or twice. Some of you reading this article might be wondering what the heck it means.
It’s actually a super duper easy one to explain. Aquafaba is essentially the water that’s been left over after your beans have cooked.
So, whichever method you opted for, be that cooking on the stovetop, cooking in the pressure cooker, or cooking in the slow cooker, you’ll be left with a thick water afterward which you can drain.
However, some people choose to actually keep the aquafaba, because it can be utilized in a few recipes of its own. Because of the thick texture it’s acquired from the beans, it makes a fantastic vegan substitute for eggs.
So, if you’re planning on making any baked goods, such as cakes or cookies, perhaps take a look for ones that require aquafaba as an egg replacement.
This is a really good way to utilize the leftover water, and in addition to this, it’s also packed with all of the nutrients granted by the garbanzo beans.
How Do I Store My Garbanzo Beans After Cooking?
This was one of the most frequently asked questions that we received regarding the cooking of garbanzo beans, and it was all to do with how to store them after you’re done cooking.
Some of you reading this article might not want to use your garbanzo beans immediately after cooking them, and still need some time to find a recipe that you’d like to incorporate them into.
If this is the case, then you’re probably wondering what the best method of storage is.
After you’ve finished cooking your garbanzo beans, then we’d recommend that you place them in an airtight container. You can either use a sealed sandwich bag, or even better, some plastic tupperware.
After you’ve done this, you can go ahead and place them in the refrigerator. If you keep them outside of the fridge, they’ll spoil very quickly, so be sure to store them properly.
After you’ve placed them in the refrigerator, they will keep for approximately 3 – 4 days in total, so make sure that you use them within this time period.
If however, your chickpeas are dry, and you haven’t cooked them yet, then they can be stored on the countertop for a few days in an airtight container.
Can I Freeze Cooked Garbanzo Beans?
Some of you reading this article might be wondering whether or not you can freeze your garbanzo beans to use at a later date after cooking.
The answer to this question is, absolutely yes! You can totally store your cooked garbanzo beans in the freezer, and these will last for a total of 6 months. Make sure that you write down the date that you froze them, so that you can refer back.
We’d like to give you a few tips about storing your chickpeas however, before you freeze them.
Make sure that you’ve cooked your chickpeas to be a little bit on the firmer side before cooking, and also take care to make sure that they’ve dried out, and don’t have any water left.
Why do you need to do this? We hear you ask. Well, it’s because chickpeas are prone to getting super mushy when they’re placed in the freezer. They will have a far more gooey consistency than they previously did upon storage.
Therefore, it’s good to keep this in mind before freezing them, and also deciding what you’d like to do with the chickpeas after they’re done thawing.
Frozen chickpeas would be really great for dishes such as hummus, where essentially, the mushier the better. It’s all about planning ahead.
Have you ever made something so delicious that you wished you could savor it forever?
Only to find that the recipe has now mysteriously vanished from your phone and the entirety of the internet. Yep, there’s not much more painful than that.
Hi, my name is Mark Williams and I have been infatuated with cooking since I was young. I would beg my mother to pull a chair up to the counter so I could watch what she was doing.