Melting them is one of the best ways to take your baked goods up a notch, or rejuvenate your fresh fruit with a sweet, crunchy coating. It’s so easy to do, you have no excuse not to!
In this article, we’ll be walking you through seven of our tried and tested methods for melting white chocolate chips. Whether you’re in a hurry or you have time to spare, you’ll find a method to suit you.
What Are Chocolate Chips?
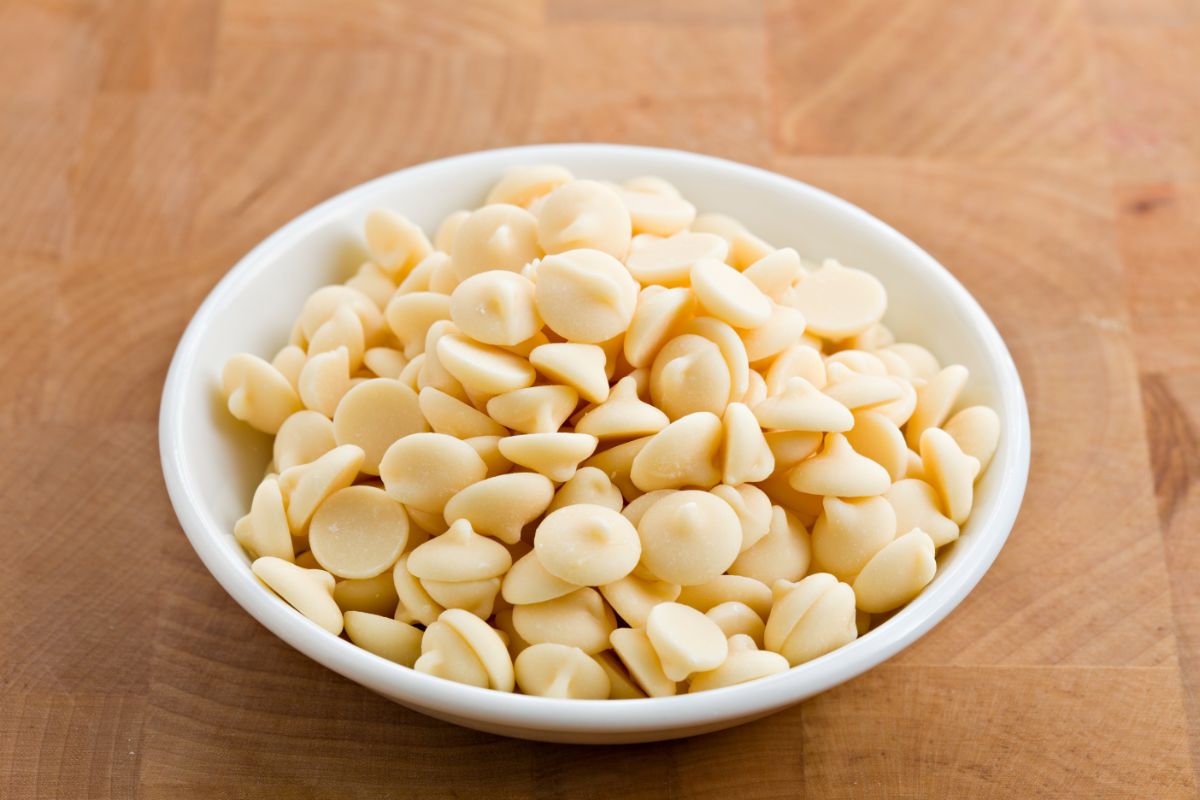
Chocolate chips (sometimes called chocolate morsels) are small, round chunks of chocolate, all of uniform size, and they’re usually used in baking.
Chocolate chips can be white chocolate, milk chocolate, or dark chocolate, and they usually contain less cocoa butter and are more highly processed, than other chocolates.
Although they’re most commonly used in baking, you may also find chocolate chips in trail mix, in ice cream, or even in oatmeal.
Why Should You Melt Chocolate Chips?
Like some, you may enjoy melting your chocolate chips. Melted chocolate chips are used by pro and novice bakers (and chefs) to create a variety of different foods. You can use your melted chocolate chips to create:
Or… just melt it to dip anything in it! Seriously, it tastes great. You could dip almost anything you like in melted chocolate chips, including:
Shortbread
Apple slices
Pretzels
Strawberries
Crackers
Candies
Nuts
… And much more. The only limit is your imagination!
Chocolate Chips vs. Melting Chocolate: What’s The Difference?
If you’re getting prepped to bake a delicious, chocolate-topped cake, you’ve probably seen a few options, including melting chocolate and chocolate chips.
Melting chocolate (also called baking chocolate) and chocolate chips aren’t exactly the same thing, and although you can use them interchangeably, you’re not going to get the best results. Here’s why.
When you heat chocolate chips in baked goods, they can keep their shape. Why? Well, they contain added stabilizers (usually soy lecithin) that help the chocolate keep its shape when heated.
That’s why, although you can melt chocolate chips, they usually take a little longer than melting chocolate. Chocolate chips will also give you a much thicker texture when melted.
Ultimately, melting chocolate melts better, and it has a thinner texture. This makes it a more popular choice for cake drizzle, for example, because it doesn’t have as much of a heavy texture.
How To Melt Chocolate Chips
If you want to use melted chocolate chips for your baked goods/culinary creation, there are a few ways you can melt them, including:
The microwave
On the stove
In melted butter
In the slow cooker
Double boiler
In milk or hot cream
Each method requires a different process, and we’ll be walking you through the ins and outs of each one. You’ll also learn what equipment you might need to get started, and how to fix any potential issues along the way!
#1: The Microwave
Thank god for microwaves. How many times has the microwave saved you at the last minute? Seriously – one of the best. Inventions. Ever.
Unsurprisingly, the microwave is also one of the easiest ways to melt your white chocolate chips, too. It gives great results every time, and it’s low maintenance. No mess, no fuss – just let your microwave work its magic!
To melt your white chocolate chips in the microwave, you’ll need:
A Microwaveable Bowl
We’d recommend a silicone heatproof bowl, a ceramic, or a glass bowl. If you’re not sure whether your bowl can be used in the microwave, check the bottom of the bowl for more information.
If you have a bowl with handles or a rim – this is a real winner. The handles or rim will be cooler than the rest of the bowl, and it’ll make it much easier (and safer) to remove your chips from the microwave when they’re melted.
Remember: You should NEVER use plastic in the microwave. Most plastics contain harmful chemicals which can enter your food. It’s not safe, and it’s definitely not good for your health.
Whisk, Spoon, or Spatula
You’ll also need a whisk, spoon, or spatula to start melting. Silicone and rubber spatulas are a popular choice, and they make it miles easier to scrape off all the melted chocolate that’s collected at the bottom of a bowl.
If you’re going to use a spoon, avoid a wooden one. Wooden spoons have a tendency to retain moisture; just a few drops can affect the taste and texture of your chips, and even transfer odor.
If you’re going to use a spoon, metal is best. Just don’t put it in the microwave with your bowl, or you’ll be asking for trouble.
Directions
Place your desired amount of chocolate chips into a microwave-safe bowl.
Microwave your chocolate chips (uncovered) for approximately 60 seconds at medium heat.
Remove your bowl from the microwave, and stir your ingredients with your spoon or spatula. If some chips are still unmelted, heat them again for 10 seconds, and repeat until all the chocolate is melted.
When your chocolate chips are at least 90% melted, remove them from the microwave, and keep stirring until melted. The leftover heat in the bowl should melt the final 10% in a few seconds.
#2: On the Stove
Another popular option is to use your stove. If you don’t have a microwave, using the stove is the most efficient way to melt your chocolate chips, you just need to be more vigilant.
Don’t leave your chocolate chips unattended when they’re melting, as they can burn in a matter of seconds. Here’s what you’ll need to melt your chocolate chips on the stove:
A spatula or a whisk
A pan
A stove (electric, gas, standalone)
Chocolate chips
Directions
Turn your burner down to the lowest heat possible
Put your white chocolate chips into a pan and place them on a burner
Start stirring your chocolate chips as soon as they’re in the pan. Even on low heat, they’ll warm up fast. Keep stirring until melted to avoid burning.
When your chocolate chips are melted (or at least 90% melted), take the pan off of the burner and stir through until your chocolate chips are melted.
If your chocolate chips are thicker than your desired consistency, you can thin them out with a little added coconut oil, vegetable oil, or shortening.
#3: Double Boiler
The double boiler method can be used by pro and novice bakers alike, and it offers some of the best results. However, it isn’t always easy. The double boiler method requires a lot more care and attention than the microwave or the stove.
One of the biggest potential issues with the double boiling method is ‘seized chocolate’. Your chocolate will become seized if a small amount of liquid (usually produced by the steam), gets into your chocolate chips.
‘Seized chocolate’ will become thick and lumpy, with an unpleasant consistency. It will also stop melting, even when exposed to high heat – so be careful!
To avoid any potential mishaps, follow this guidance to the letter. Here’s exactly what you’ll need to pull off the double boiler method:
Double Boiler: A double boiler is made from two stacked pots.
The largest pot will contain boiling water, and the smaller pot will sit inside the larger pot and hold the food that’s being heated (in this case, the chocolate chips). As the water in the larger pot boils, it will produce steam that will cook the food in the larger pot.
A spatula or a whisk
Stove
Directions
Get your large and small pots to hand, and place around 2 inches of water in the large pot
Heat the water in your large pot until it’s hot, but not boiling. When the water boils it will start to release steam, which could impact the quality of your chips and lead to seized chocolate!
Once hot, place your chocolate chips into the smaller pot.
Put the smaller pot on top of the larger pot (aka double boiler) with the hot water inside it.
Now, leave your chocolate chips to heat for 2-4 minutes. When they start melting, stir them consistently with your spatula to avoid burning.
Stir until around 90% of your chocolate chips have melted. Once melted, remove your chips from the heat.
If you still have some unmelted chips, keep stirring until the residual heat melts them.
How Do You Make A Double Boiler?
To pull off this method, you’ll need to know how to make a double boiler. (That’s assuming you don’t already have one!). Thankfully, making your own double boiler is easy. Here’s what you’ll need, and how to do it:
A large pot
A glass bowl that will fit over the large pot, but not touch the bottom
A spatula or whisk
Directions
Pour two inches of water into your large pot
Heat the water until it’s hot (but not boiling), as this could damage your chocolate chips
Place your second bowl over the pot of hot water
Leave your chocolate chips to heat for 2-5 minutes. When they start melting, stir them continuously until the majority of them are melted
Take your pan off the heat, and stir until the rest of the chips have melted
#4: Slow Cooker
If you have a slow cooker, you’re in luck. You can also use it to melt your chocolate chips in! Although this method works wonders, it is pretty slow. So, if you’re in a rush, this probably isn’t the method for you.
Like the double boiler method, you’ll need to be careful not to let any water get into your chocolate. Here’s what you’ll need to melt your chocolate in the slow cooker:
Slow cooker
Mason jar or a small glass pot
A long spoon or spatula
Directions
Pour your chocolate chips into your mason jar or small glass bowl
Put your jar (s) in the slow cooker. If you’re using multiple jars, make sure you space them out and leave plenty of room
Once the jars are in your slow cooker, add around 2-3 inches to the base. Ideally, your water level should be about halfway up your mason jar
Now, set your slow cooker to high heat, and cook your chocolate chips uncovered. It’ll take around 30 minutes for your chips to melt
#5: In Melted Butter
This may not be the first method that springs to mind, but yes, you can also melt your chocolate chips in butter! The end result is GORGEOUS, but why would you do it?
Well, it depends on why you’re melting your chocolate chips. However, melted chocolate chips and butter are two staple ingredients in a variety of delicious recipes, including brownies!
So, if your recipe calls for both of these ingredients, you may be able to kill two birds with one stone and melt them together.
You can melt your butter and chocolate chips together on the stove, or with the double boiler method. Both work well, but the stove is usually much quicker and easier.
You could even use the microwave if you want to be even more efficient! Here’s what you’ll need to melt your chips with butter:
Unsalted butter
A pan or double boiler
Spatula or whisk
Directions
Add your butter and chips to a bowl or a pan
Heat them on low heat over the stove, or heat them at medium heat in the microwave. On the stove, it will take a few minutes for them to start melting. In the microwave, it will take 30-60 seconds.
When the butter and chips start to melt together, stir them together with a spatula
Keep stirring your mixture together until the ingredients are melted. The end mixture should be completely smooth, with no lumps!
#6: In Milk Or Whipped Cream
Again, this probably isn’t your go-to technique to melt your chocolate chips. However, it works EXTREMELY well for a variety of recipes, including one of our all-time favorites – ganache!
Melting your chocolate chips with milk or cream is simple. Here’s what you’ll need, and how to do it:
Milk or cream
Medium mixing bowl
A plate to use as a lid for the bowl
Pan or microwave-safe container (this will be used to heat your liquid)
Directions
Heat your milk or cream until it starts steaming, but don’t let it boil. You can heat your milk on the stove or the microwave – either will give you the same result!
Put your chocolate chips into a mixing bowl
When your milk or cream is hot and steamy (but not boiling), you can pour it over your white chocolate chips
Now, cover your bowl of chocolate chips with a plate to retain the heat. Leave the bowl covered for 5 minutes to melt the chips
After 5 minutes, you can remove the plate lid and stir the cream and melted chocolate together until it creates a smooth and creamy mixture
#7: The Sandwich Bag Method
We know what you’re thinking…. Sandwich bag? What?
No, we’re not joking – this really is another way to melt your chocolate chips, and in case you hadn’t guessed, the primary piece of equipment you’ll need is a sandwich bag.
This method is PERFECT if you want to use your white chocolate chips as a drizzle. Here’s what you’ll need for the sandwich bag method:
A sandwich bag
A glass bowl
Hot water
Directions
Place your desired amount of chocolate chips into a sandwich bag, or a resealable Ziploc bag
Seal your bag completely
Boil some water, and leave it to cool for 5 minutes. When the water is warm (but not boiling), pour it into the bowl
Place your Ziploc bag of chocolate chips into the bowl, and leave them to stand for a few minutes
When the chocolate is melted, use a pair of scissors to cut a small opening in the corner of the bag. You can now use this as a drizzle!
What Happens If The Chocolate Goes Hard When Melting?
We all love chocolate, but it’s notoriously difficult to work with. Even the melting process (which seems pretty straightforward), can throw you plenty of curveballs – including this one. Hardened chocolate.
You’ve exposed your chocolate to high temperatures – it should be melted, right? If it isn’t, you’ve made a very common error. It’s seized.
If you’ve been heating your white chocolate chips at high temperatures, and a cold liquid or substance has entered the mix, it’ll cause the chocolate to seize up and clump together. It’s arguably one of the most disheartening things EVER, but it happens to the best of us.
There’s also a silver lining to this mistake – your chocolate can still be used, as long as it’s not burnt!
Before you bin it, try adding a few extra pieces of solid chocolate to the mix (note: this won’t work if your chocolate is already ‘too hard’).
You could also add some fat to the mixture (cocoa butter is best), but if you don’t have any, vegetable oil can also work. Although this won’t perfectly melt chocolate, it can still be used in cakes, brownies or cookies. Waste not, want not!
Other Ways To Fix Seized Chocolate
You can’t always fix seized chocolate, but it’s worth a try.
Try adding three tablespoons of warm water to every full cup of chocolate chips. This can help soften the mixture, just ensure the water is warm (not cold), and you’ll avoid seizing it even further.
You can also try reheating your mixture in the microwave for around 15 seconds. You may need to repeat a few 15-second intervals to melt this perfectly. Between each interval, stir your mixture with a whisk to smooth out the mixture.
How To Use Melted White Chocolate
There are so many reasons why you might choose to melt white chocolate chips. They have so many uses and let’s be honest, melted white chocolate is nothing short of delicious. Here are just a few things you can use your melted white chocolate chips for:
White chocolate and strawberries are nothing short of a match made in heaven. Here’s how you can melt your white chocolate morsels and use them for strawberries:
Pour one or two cups of white chocolate morsels into a microwaveable bowl
Heat your chocolate morsels in the microwave at medium heat. Put them in for 60 seconds, uncovered
Remove the bowl from the microwave, and add in a quarter of a teaspoon of coconut oil. Mix it together with a spoon or spatula, and scrap the mixture from the sides and bottom of your bowl
When your morsels are 90% melted, remove the mixture from the microwave and continue to stir it until the morsels are melted
If your white chocolate chips still look too thick for dipping, you can add in another quarter teaspoon of coconut or shortening. Mix it together until smooth
When you’re happy with the consistency of the morsels, dip your strawberries into the mixture until they’re half coated
Place your covered strawberries onto a sheet of parchment paper until they’re dry
Once dry, store your strawberries in an airtight container in the refrigerator
What’s The Best Way To Melt White Chocolate Chips For Strawberries?
Honestly, the most effective way to melt white chocolate for strawberries is in the microwave. The microwave is your best friend, so use it! This applies to white chocolate chips and morsels, as well as real white chocolate.
However, your real white chocolate will usually have thicker chunks, which will take longer to melt. So, you may need to heat them for longer to get the right consistency.
You can also add in some coconut oil or shortening to give the real melted white chocolate a much smoother consistency.
Real white chocolate will not usually contain cocoa butter. It may contain palm or another oil, instead. Not sure if you have real white chocolate? Check the label.
What Does Tempering Chocolate Mean?
If you’re looking for the best ways to melt your chocolate chips, you’ve probably heard of tempering your chocolate. But what exactly is it, and how does it work?
Tempering is a French technique that can also be used to achieve those statement silky, glossy, chocolate chips. However, tempering requires a lot of patience and a very steady hand.
Although it’s not the go-to method for melting chocolate chips, it gives great results. Here’s how to do it.
Directions
In a double boiler, melt ⅔ of your chocolate and stir it consistently. If you have a thermometer, keep stirring until your chocolate reaches around 115 degrees Fahrenheit, and no higher than 120 degrees Fahrenheit.
Once your chocolate has reached the desired temperature, remove it from the double boiler. Ensure any equipment your chocolate comes in contact with is completely dry, as exposure to water will cause your water.
Now, gradually add in the remaining chocolate and lower the temperature. Stir your chocolate consistently when it’s melting, and keep stirring until the temperature reaches 84 degrees Fahrenheit.
This can take a LOT longer than other methods, usually around 15 minutes, so be patient and keep stirring! (You can speed up this process by placing your bowl of melted chocolate into an ice bath – just take care not to get any water into the chocolate)
Reheat your chocolate by placing the bowl back over the boiler (for 5-10 seconds at a time), and keep stirring it until it reaches 89 degrees Fahrenheit. Do not let the chocolate heat up beyond 91 degrees Fahrenheit.
That’s it – your chocolate has now been tempered! You can test if you’ve achieved the right consistency by placing a small piece of chocolate onto some parchment paper.
Leave it to sit at room temperature for two minutes. If your chocolate is smooth and firm, it’s been perfectly tempered.
Mistakes To Avoid When Melting Your Chocolate Chips
When it becomes a liquid, chocolate can be difficult to work with. If you’re not careful, you could end up making a number of rookie errors that will ruin your mixture, and sabotage your baking plans.
To set yourself up for success, take a look at these common mistakes you’ll need to avoid when melting your chocolate chips:
Not Drying Your Tools
This is probably the most common mistake people make when melting their chocolate chips: not drying their tools. Please, people, remember to dry them!
Your equipment will need to be BONE dry before you start melting your chocolate. This includes your bowl, your whisk – everything.
If there’s even just a drop of water on your equipment, it could seize up your chocolate, and you’ll risk having to start the whole process from scratch. Not exactly ideal.
Rushing The Process
If you want your chocolate to be perfectly melted, you’ll need to avoid rushing the process. It takes time to achieve great results.
If you’re exposing your chocolate chips to too much heat too quickly, you could either burn them, or you’ll end up with a gross, grainy texture that won’t be very pleasant to drizzle or dip with.
No matter what method you use, you’ll need to keep stirring your chocolate, and heat it slowly. If you’re heating it in the microwave, heat it in 10-15 second intervals and keep stirring.
Don’t forget to keep stirring around the edges of your pan or bowl when the chocolate is heating up. This will prevent it from sticking to the sides.
Not Using The ‘Good Stuff’
Sometimes, if you want the best results, you have to be willing to splash the cash. The quality of your chocolate can make or break your end result. Ideally, you’ll want a quality chocolate with a high cocoa butter content.
If you have time to do a test run, we’d recommend testing several brands to see which one you like best.
We know it’s not always possible to invest in expensive chocolate, but if your melted chocolate is for a special occasion, it’s really worth it.
Poor-quality chocolate chips (or real chocolate) can struggle to melt correctly, giving you a grainy or lumpy texture that just won’t go down well.
These are some of the most common issues novice (and experienced) chocolate melters run into.
Although these won’t guarantee quality melted chocolate (there are still many things that could go wrong during the process!), by reminding yourself of these things, you’ll be setting yourself up for success.
So, before you start cooking, take note of these and do your best to avoid them.
The Bottom Line
… And that’s a wrap! Thanks for sticking with us. We’ve been so excited to share these tips with you, and we can’t wait for you to try them. Honestly, the possibilities are endless!
By now, you should be a fountain of knowledge when it comes to melting white chocolate chips. These methods can also be used for dark chocolate chips and chocolate bars, too, so the more you know the better!
You’ll never find yourself stuck for options again with these exceptionally effective methods. When done right, you’ll get the best results every time – so, what are you waiting for? Chuck on your apron and get melting!
Have you ever made something so delicious that you wished you could savor it forever?
Only to find that the recipe has now mysteriously vanished from your phone and the entirety of the internet. Yep, there’s not much more painful than that.
Hi, my name is Mark Williams and I have been infatuated with cooking since I was young. I would beg my mother to pull a chair up to the counter so I could watch what she was doing.