Although you may think of it as something to have during the fall season (and don’t get us wrong, it’s fantastic in fall!), pumpkin is a delicious food that you can enjoy all year round.
Whether it’s cooked into a mouth watering dish or even used in a delicious dessert, pumpkin is a food that will make your taste buds tingle no matter how you have it. Don’t believe us?
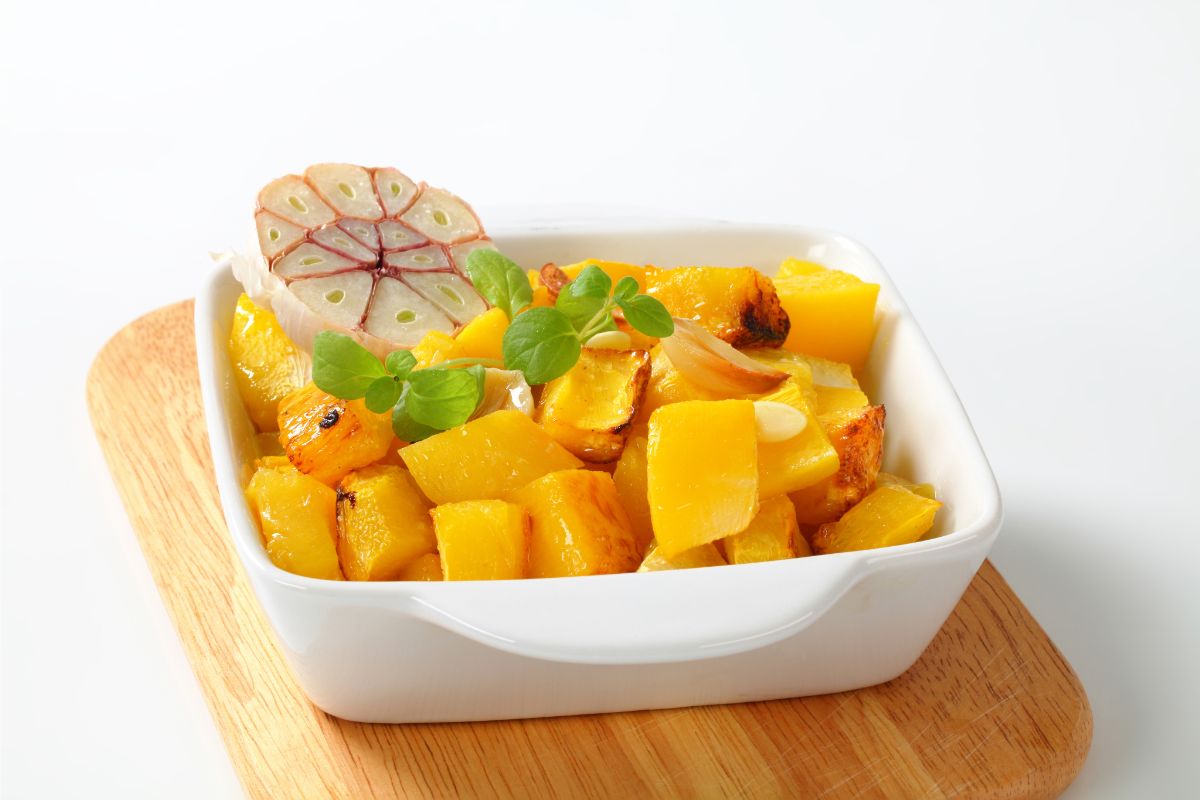
Well, just try roast pumpkin cubes!
Roast pumpkin cubes are ideal, with their fantastic browned and caramelized finish, as well as the fact that they’re very quick and easy to make. On top of that, they’re the ideal addition to any salad.
These bite-sized treats of pumpkin bring all the unique flavor of pumpkin, with its sweetness and nuttiness, in delicious crispy servings. But how do you make roast pumpkin cubes?
To put it simply, you begin by washing and peeling the pumpkin, then cutting it into cubes. After that, toss the cubes with some fat, then sprinkle your favorite seasonings on it to add extra flavor.
Finally, roast your prepared pumpkin cubes in your oven, before leaving them to cool down. Once cool, add them to your salad or enjoy them in another dish.
However, there is plenty more to learn all about the delicious bite-sized treats that are roast pumpkin cubes, and we’ve got all the answers you need in our delicious guide below!
We’ve got a more in-depth recipe for making the best roast pumpkin cubes, information on how to make them with or without peeling the pumpkin first, details on storing your roast pumpkin cubes, and much more.
Read on!
Why Should You Make Roast Pumpkin Cubes?
Before we get into our recipes for how to make the ideal roast pumpkin cubes, it’s worth looking at why you’d want to make these delicious treats in the first place.
For a start, pumpkin is a fantastic food that adds unique flavor to any dish, or works great on its own.
Whether you’re making a savory dish that’s got pumpkin in it, or you’re making a pumpkin-based dessert like a pumpkin pie or a pumpkin mousse, then you’ll already know how versatile this delicious squash is.
And what does pumpkin taste like? Well, it’s pretty unique, with a brilliant blend of sweetness and nuttiness that’s hard to put a finger on.
Of course, this is the kind of flavor you get when the pumpkin is cooked. If you’re eating the pumpkin raw, then you can expect a taste that’s a bit more bitter, but still tasty.
Even better, pumpkin is the ideal fall food. Although you can enjoy its delicious flavor all year round, it’s one that’s especially great to try during the fall.
After all, a pumpkin is one of the iconic Halloween images! It’s a food that has connotations of coziness, spookiness, and intrigue during this time of year.
As we’ve said, you can enjoy pumpkin in a wide variety of different forms. However, we would recommend roast pumpkin cubes as one of the very best.
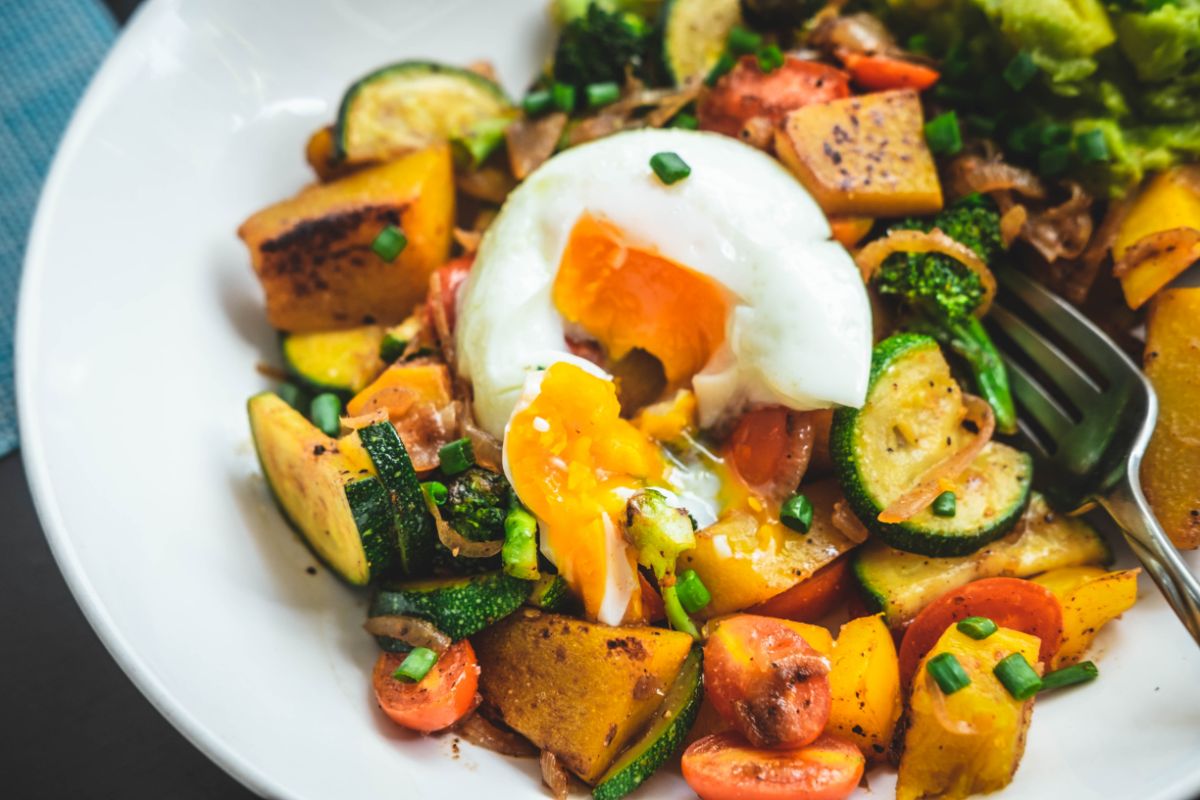
For one, they’re a great bite-sized treat, never too filling and something you’ll want to keep coming back to again and again. On top of that, they’re great for adding to salads, or you can use them as a side with a main dish.
Quick and easy, they’re a brilliant pumpkin-based treat that’s terrifically simple to throw together – and yet full of flavor and texture.
What Type Of Pumpkin Should You Use?
Of course, if you’re going to make roast pumpkin cubes, then you’re going to need to make sure that you use the best type of pumpkin for the job! So, what pumpkins will be best for cooking?
Ideally, you’ll want to find small round sugar pumpkins. These are especially delicious when cooked, and they’re easier to peel and chop than larger pumpkins too.
If you’re looking in your local grocery store, then they might be found under the name “sweet pumpkins” or “pie pumpkins”. Alternatively, you can search your local farmers market.
In terms of size, these small pumpkins measure around 8 inches in width and 6 inches in height.
While you might think that a big pumpkin would be preferable for cooking with, there’s actually plenty of reasons why you should stick with a small pumpkin like this!
For one thing, giant pumpkins simply taste less good than sugar pumpkins.
The larger pumpkins are better for carving. On top of that, some large pumpkins will have loads of stringy bits inside, which are just a hassle to deal with.
When it comes to picking out small round sugar pumpkins, there are a few different named varieties to look out for.
For example, a Cinderella Pumpkin tastes great and is simple to peel.
Additionally, a White Casper Pumpkin offers something a little bigger than typical sugar pumpkins, though they still offer great flavor and easy peeling.
And if you really want to mix things up? You could use butternut squash instead! These aren’t pumpkins, but they have a similar taste and texture.
What Will You Need To Make Roast Pumpkin Cubes?
Now that you’ve got the perfect type of pumpkin to make your roast pumpkin cubes from, you’ll need to make sure that you’ve got the right utensils and tools for the job.
So, to make your roast pumpkin cubes, you will need:
A Bowl – this will be used to hold all your pumpkin seeds, which you can then roast later for extra tastiness!
Sharp Knives – if you’re going to peel your pumpkin using a knife (rather than a vegetable peeler), then you’ll want to use a paring knife. On the other hand, you’ll need a sharp butcher’s knife for the actual cutting of the pumpkin.
Vegetable Peeler – of course, you can use a vegetable peel to peel your pumpkin instead of a knife. If you do it this way, make sure to use a heavy-peeler to make the job easier.
Cutting Board – when you’re cutting your pumpkin into pieces, you’ll need to do so on a sturdy cutting board.
Roasting Pan – you’ll be lining your pumpkin cubes across this, ideally in a single layer. Make sure you have a big enough pan to do so. Alternatively, you can use a big sheet pan.
Parchment Paper – you don’t have to line your roasting pan or sheet pan with this, but it will make it easier to wash up later! Parchment paper lining will help keep your pan safe from oil and heat.
Vegetable Scrubber – you’ll only want to be using clean pumpkins, so use a vegetable scrubber or a vegetable brush to clean any dirt off your squash before cooking with it!
What Ingredients Do You Need To Make Roast Pumpkin Cubes?
With all the right cooking utensils in place, it’s time to ensure that you’ve got all the right ingredients to make roast pumpkin cubes.
Thankfully, these deliciously sweet and nutty treats require very few ingredients, making them extra easy to make!
You will need:
Small Sugar Pumpkin Or Pie Pumkin – first and foremost, you need the best pumpkin for the job. Small pumpkins are best, and we recommend sugar pumpkins or pie pumpkins.
Salt And Pepper – a classic for any piece of cooking, these season the cubes with extra flavor.
Seasonings – of course, salt and pepper aren’t the only seasonings you’ll want to use. Try applying your favorite seasonings to bring extra flavor to the cubes. We recommend seasonings like garlic, chili powder (for those who like their food spicy), brown sugar, or cinnamon (for a subtle hint of spicy warmth).
Fat – we recommend butter or a clarified butter, because it gives it loads of flavor, but things like coconut oil or olive oil are good alternatives. For every cup of pumpkin you’re cooking with, use around 1 tablespoon’s worth of the fat.
How To Make Roast Pumpkin Cubes (With Peeling The Pumpkin)
At last, with all your ingredients and cooking utensils in place, it’s time to make your very own roast pumpkin cubes!
This isn’t a hard recipe to follow by any means, but it does have quite a few steps, so make sure you follow our instructions carefully!
By the end you’ll have delicious cubes to enjoy on their own, add to a tasty dish, or throw into your salad.
Step One: Preheating Your Oven
To begin with, you’ll need to preheat your oven and leave it to reach the right temperature. Turn your oven on and set it to 425 degrees Fahrenheit (which is 220 degrees celsius), then leave it to preheat to that temperature.
If you don’t preheat your oven, your food isn’t going to cook as best it can in the time we’ve given.
Ideally, the oven will have just become preheated by the time you’ve prepared the pumpkin.
Step Two: Clean And Dry Your Pumpkin
It’s incredibly important that you clean your pumpkin thoroughly before scrubbing, getting rid of any dirt and germs that might be hiding on it.
After all, nobody wants to be eating those! Depending on where you got the pumpkin, there’s a chance that it’s got debris and dirt on it, so it’s always important to wash and clean the squash.
To do this, you can use your vegetable scrubber or vegetable brush. Scrub the pumpkin thoroughly on every part of it, leaving nothing left untouched.
On top of that, you’ll also want to wash your pumpkin, which will clean it even more thoroughly. Again, make sure to wash every part of it.
Once it’s washed and scrubbed, pat your pumpkin so that it’s dry.
Step Three: Preparing To Peel
Now that your pumpkin is properly cleaned, it’s time to peel it for cooking.
In order to make your peeling process easier, make sure that you’ve left the stem on your pumpkin, rather than cutting it off before this point. Why?
Well, the stem is a very useful handhold for you to use while peeling, allowing you to keep the pumpkin nice and steady while you’re peeling it.
If your pumpkin is unstable during peeling, it’ll not only make the peeling harder, but it could also put you in danger.
Not only do you want that stem handhold, but you’ll also require a heavy-duty vegetable peeler. Pumpkins are known for their tough skins, which means that you’re not going to be able to use any old peeler on them.
For example, the light and small peeler you might use on an apple is not going to work for a pumpkin’s tough skin!
Step Four: Peeling Your Pumpkin
With a sturdy, heavy-duty vegetable peeler to hand, and the stem of your pumpkin still in place, it’s time to start peeling the squash.
You’ll want to do a good and thorough job of it, getting rid of the skin from every part of the squash.
To start with, put your washed and dried pumpkin down flat on your cutting board so that the stem is facing towards the ceiling.
Now grip that stem with your weaker hand, then grip the vegetable peeler with your dominant one. Holding the peeler by the top of the pumpkin, begin peeling down the squash, keeping a steady hand.
While doing this, make sure that your fingers aren’t going near to the blade.
Additionally, make sure that you’re keeping a strong grip on the stem, so that the pumpkin is keeping stable and not throwing your peeler off.
Once you’ve peeled a downward line on the pumpkin, stop peeling and rotate it a bit, then peel down another section.
Keep doing this in a straight direction around the pumpkin, stopping and rotating whenever you need, and keeping a steady and safe hand at all times.
Eventually, you’ll have peeled all around the pumpkin, leaving only the top and bottom left. So, for the finishing touches, peel the top and bottom on their curves!
Step Five: Removing The Pumpkin Stem
Now that you’ve finished peeling the pumpkin, you don’t need the handhold of the pumpkin step anymore, so you can remove it.
Depending on your pumpkin, it might be simpler to cut it off straight away. If it isn’t, then you’re probably going to have to cut it around the stem, like you’re carving it, and then get it out that way.
Either way, make sure you’ve removed all of the stem before moving on.
Step Six: Cutting Your Pumpkin In Half
With the stem removed, you can now cut the entire pumpkin in half. You want to do this directly down the middle, cutting it from where its stem used to be all the way to its bottom, so you’re left with two equal halves.
Pumpkins are pretty tough, so you’ll need a strong and sharp knife to cut it. A sharp butcher’s knife will be best for the job. Make sure that you’re very careful when cutting it – keep your fingers away from the blade!
Step Seven: Removing Unwanted Bits
With the pumpkin cut in half, you’ll now be able to see its insides easier. In there, you should be able to see lots of pumpkin seeds, as well as hanging strings.
Naturally, you’re going to want to remove these, but for different reasons! The pumpkin seeds might be something you want to keep to roast later, so put them aside in a bowl.
Meanwhile, the hanging strings are going to be pretty unpleasant if they get roasted with your cubes, so make sure you get rid of these stringy nuisances.
Step Eight: Cutting The Pumpkin Into Cubes
With your pumpkin halves de-stringed and de-seeded, it’s time to cut it all down into pumpkin cubes!
Begin doing this by cutting the pumpkin halves into a handful of slices, making sure to get rid of any stringy bits that still remain on them.
With your pumpkin now in more-manageable slices, you can start cutting it into cubes. You want to aim for the cubes being around 1 inch.
Once you’ve got all your cubes, put them in a big bowl. Alternatively, put them in a ziplock bag.
Step Nine: Preparing Your Pumpkin Cubes
Next up, coat your pumpkin cubes with your melted butter (or whatever type of fat you’ve chosen to use). After that, apply salt and pepper, as well as any other seasonings you wish to add to the pumpkin cubes.
The cubes are tasty on their own, but they’re even better with seasoning!
After that, cover your sheet pan with some parchment paper, then spread out the pumpkin cubes across the pan in one layer.
Step Ten: Cooking Your Pumpkin Cubes
Now place your sheet pan into your preheated oven and leave it for 30-40 minutes. Stir the cubes a couple of times throughout. By the suggested time, the cubes should be browned a bit.
Step Eleven: Enjoy!
When the pumpkin cubes are finished, carefully remove them from your oven. They should be tender if you stick a fork in them. Turn your oven off, then leave the cubes to cool the desired amount and enjoy them!
How To Make Roast Pumpkin Cubes (Without Peeling Your Pumpkin)
On the other hand, you can still get great roasted pumpkin cubes even if you’re unable to peel the pumpkin. If you haven’t got a heavy-duty vegetable peeler, this is the method for you!
Step One: Preheating Your Oven
Like with the other process, preheat your oven to 425 degrees Fahrenheit (which is 220 degrees celsius).
Step Two: Clean And Dry Your Pumpkin
It’s essential that you thoroughly clean your pumpkin of dirt and germs, so use a vegetable scrubber and wash every inch of the squash. When done, dry it.
Step Three: Removing The Pumpkin Stem
After that, remove your pumpkin stem and cut the top of your pumpkin.
Step Four: Cutting Your Pumpkin In Half
Using a sharp butcher’s knife, cut your pumpkin in half straight down its middle, from top to bottom.
Step Five: Removing Unwanted Bits
Next up, remove all the pumpkin seeds, then either throw them away or put them in a bowl for roasting them as a delicious snack later. Additionally, get rid of all the stringy bits inside the pumpkin.
Step Six: Cutting The Pumpkin Into Crescent Slices
Rather than cutting your pumpkin into cubes at this stage, you need to cut it into crescent-shaped strips instead. Each strip should be around 1 inch wide.
Step Seven: Preparing Your Pumpkin Crescent Slices
After that, brush your crescent slices with your melted butter, or whatever other type of fat you’ve chosen to use.
With that done, it’s time for seasoning! Cover them with generous amounts of salt and pepper, as well as any other seasoning favorites you want.
Step Eight: Cooking Your Pumpkin Crescent Slices
Now line a sheet pan with some parchment paper and put your pumpkin strips on it. Place the pan in your preheated oven, leaving it for 30-40 minutes.
When they’re tender, turn off your oven and remove the pan. Leave them to cool for 5 minutes.
Step Nine: Cutting Into Cubes
Now cut the strips into cubes, but do so without cutting through its peel. Have about five cubes per slice. Next, peel the peel away, and there you go! You’ll be left with roast pumpkin cubes.
Storing Roast Pumpkin Cubes
If you want to store your cubes, you can!
Refrigerating
Place the cubes into an airtight container, then put it in the fridge. It should last for 3 days maximum.
Freezing
Leave the cubes to cool, then place them in one layer on some parchment paper-lined sheet pan.
Put your pan in your freezer for an hour, then remove and put the cubes into an airtight container. Put the container in the freezer.
To thaw them later, leave them out of the freezer for a minimum of an hour, or reheat using a microwave, stovetop, or oven.
Final Thoughts
Roasted pumpkin cubes are a brilliant treat, perfect for salads or accompanying dishes. Better still, they’re easy to make! Use our guide carefully – and enjoy!
Have you ever made something so delicious that you wished you could savor it forever?
Only to find that the recipe has now mysteriously vanished from your phone and the entirety of the internet. Yep, there’s not much more painful than that.
Hi, my name is Mark Williams and I have been infatuated with cooking since I was young. I would beg my mother to pull a chair up to the counter so I could watch what she was doing.