They are light, fluffy, and super sweet – plus you can make your own batch of doughnuts in the comfort of your own home!
Doughnuts are a must-try for bakers who love making desserts so if you are looking for a great doughnut recipe to try at home, then look no further.
Here is a great doughnut recipe that is quick and easy to follow. So, take a look, and good luck!
Ingredients And Equipment
Before you start baking, you first need to gather all of your ingredients and equipment. This way if you are missing anything, you don’t get a surprise in the middle of baking and let your ingredients go to waste.
In this recipe, we will also be going over how to make a glaze for your doughnuts.
This part of the recipe is entirely optional (as you might prefer your doughnuts plain) but if you do wish to add a glaze to your doughnuts, then the ingredients you need can be found below.
So, here’s everything you need to make your own batch of doughnuts – glaze included!
Doughnut Ingredients
3 Cups of All Purpose Flour/Bread Flour
¾ Cup of Milk
¼ Cup of Unsalted Butter (Softened)
1 Egg
¼ Cup of Sugar
1 teaspoon of Instant Years/Activated Dried Yeast
¾ teaspoon of Salt
½ teaspoon of Vanilla Extract
Glaze Ingredients
1 Cup of Powdered Sugar
2 Tablespoons of Milk
1 Teaspoon of Vanilla Extract
Ingredient Alternatives For Dietary Requirements
From the list of ingredients above, there will be some ingredients that certain individuals cannot eat.
For example, the original recipe uses milk, butter, and egg – all of which are not suitable for vegans as they are animal products.
Both all-purpose flour and bread flour are also not suitable for those who are gluten intolerant so some people may also require alternative options for the flour too.
So, here are some alternative options you can swap out for the traditional ingredients used in this recipe. This way, you can adjust the recipe as you need to.
Egg – Ground Flax Seeds (Mix 1 tablespoon with 3 tablespoons of water per egg), Pureed Fruit (¼ Cup)
Equipment
1 Large Mixing Bowl
1 Wooden Spoon
1 Rolling Pin
1 Baking Tray
Round Cookie Cutter (Ideally 2.6 inches in diameter)
Baking Paper
Plastic Wrap
Optional:
1 Stand Mixer
1 Dough Hook Attachment
1 Small Mixing Bowl (Glaze)
1 Whisk
How To Make Classic Doughnuts
Now you have all your ingredients and your equipment ready, it’s time to get started with making your doughnuts! Follow the easy steps below to make your doughnuts!
Step 1: Making The Dough
To start, you need to make the dough for your doughnuts.
Take your large mixing bowl and add in the milk, sugar, egg, softened butter, salt, vanilla extract, and yeast. Mix all these ingredients together using your wooden spoon until you get a nice, smooth mixture.
Once your mixture is smooth and ready, it’s time to add in the flour. Mix it all together using your wooden spoon until the dough comes together.
You can then switch to using your hands to squeeze the dough and start to shape it into one single mass.
Your dough should not feel wet or sticky. Instead, it should feel firm and smooth – so add a little bit of extra flour at a time until your dough becomes the right texture.
Once your dough is firm and smooth and joined together in one mass, it’s time to start kneading the dough.
Kneading your dough stretches and develops the gluten strands within the dough, letting air become trapped inside so your dough will rise as it cooks.
This is what gives doughnuts that light, fluffy texture – so it’s vital you get this step right!
Transfer your dough to a clean work surface and lightly dust the surface with extra flour to help stop the dough from sticking.
Knead the dough using your hands for around 10 to 15 minutes. The dough should feel elastic and soft when done.
If you are using a stand mixer instead, then you will not need to knead the dough by hand.
Attach the dough hook attachment and at a low speed, knead the dough for around 4-5 minutes. Then, up the speed to medium and knead the dough for another 4-5 minutes.
Once your dough is finished, let the dough rest for five minutes in the bowl covered with some plastic wrap. This will give you plenty of time to rest your arms (if you kneaded by hand) and get ready for the next step!
Step 2: Shaping Your Doughnuts
Place your dough back on your flat work surface (making sure it’s still lightly dusted with flour) and take your rolling pin.
Rub a pinch of flour over the rolling pin to help prevent it from sticking to the dough as you begin flattening your dough. Using the rolling pin, roll the dough into a flat sheet that is half an inch thick.
Cut out circles using the cookie cutter and put these circles to one side – these will later become your doughnuts.
You can start making your doughnuts immediately, by rolling each circle of dough up and shaping them using your hands into that classic doughnut ring shape.
However, you can also put these circles to one side and keep cutting out all of your doughnuts.
Make sure you use up all the dough you have. Roll up the leftover dough sheet and re-roll it into another, small sheet that is still half an inch thick. Cut out more doughnuts until all the dough is used up!
Once your doughnuts are ready, take out your baking tray and prepare it with your baking paper. Place your doughnuts evenly apart on the tray.
Then, take more plastic wrap and cover the tray (some people lightly grease the plastic wrap with vegetable oil first to help prevent the doughnuts from sticking but this step is optional).
Step 3: Proof Your Doughnuts
Now that your doughnuts are placed on the baking tray and covered with plastic wrap, it’s time to proof them.
Proofing is an important step when baking bread as it allows the yeast to activate. This will help the dough to rise once it starts baking, so your doughnuts will be light and fluffy inside.
So, don’t skip this step – it’s just as mandatory as baking the dough!
Leave the doughnuts at room temperature for an hour. During this time, they will start to swell and puff up as the yeast activates within the dough.
If your room is particularly warm or cold, then your doughnuts will proof more quickly or they will take longer to proof fully respectively.
This is why it’s important to keep an eye on the doughnuts while they proof as some doughnuts can be ready for baking after just 45 or 50 minutes!
Step 4: Bake Your Doughnuts
Once your doughnuts are fully proofed, remove the plastic wrap and prepare the oven for baking. Preheat the oven to 350 degrees Fahrenheit and let the doughnuts bake in the center of the oven for 13 to 15 minutes.
Your doughnuts should be light gold (especially on the top surface) when they are finished baking.
While your doughnuts are baking, this is a good time to prepare your glaze. Take your small bowl and add together all of the glaze ingredients (powdered sugar, milk, vanilla extract).
Mix them up using a whisk until they make a thick, sweet glaze.
Remove the doughnuts from the oven when they are finished baking and allow them to cool before pouring the glaze over them. Then, you’re done! You have finished making your own batch of homemade doughnuts!
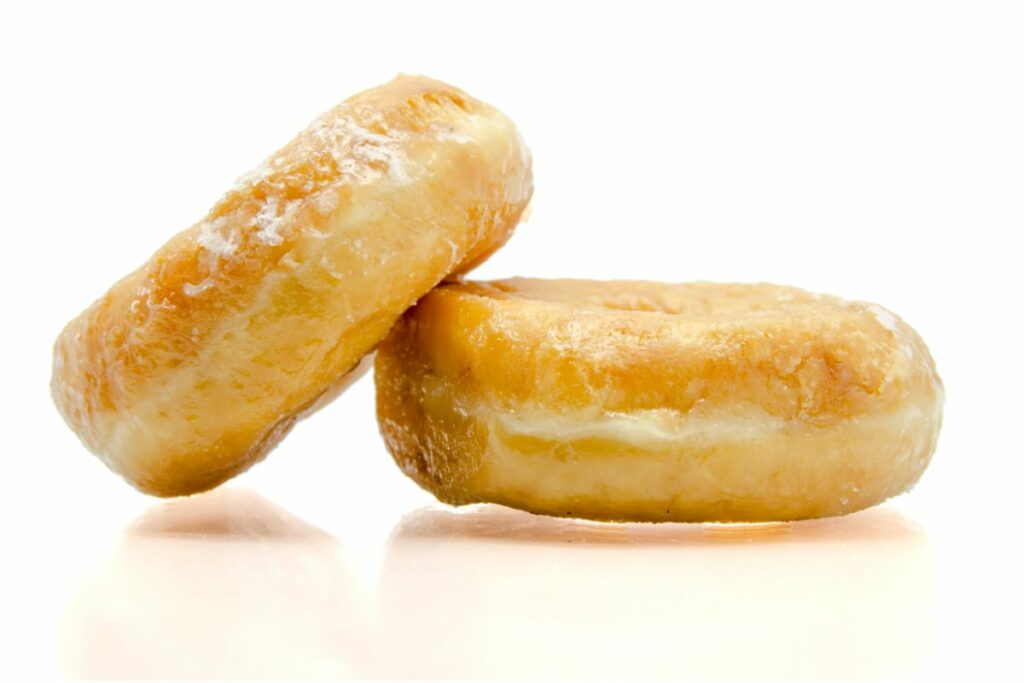
Alternative Method: Fried Doughnuts
Baking doughnuts in the oven is just one method for making your own homemade doughnuts.
Another popular method is to fry them – this makes them more moist and crisp on the outside, although it is a less healthy method for making doughnuts.
If you want to try frying your doughnuts instead of baking them, then here’s what you need to do. You still need to follow the first three steps of this recipe but you will need additional equipment and ingredients. These include:
1 Deep Saucepan or Dutch Oven
Spatula
Vegetable Oil
Plates Lined With Paper Towels
To start, take your saucepan or dutch oven and pour in the oil until it is around 2 inches in height. Heat the oil until it is around 375 degrees Fahrenheit.
It is vital you get the heat of the oil correct. If the oil is too hot, you will burn the outside of the doughnut before the inside is fully cooked (plus it’s dangerous to heat the oil too high).
On the other hand, a doughnut placed in oil that is too cold will only absorb most of the oil so it becomes greasy and super soggy – yuck!
To test if your oil is ready, you can either use a thermometer if you own one or sacrifice a doughnut, tear it up in chunks, and use a chunk of dough as a tester.
If the dough browns in the oil after 40 to 45 seconds, then your oil is ready!
Cook the doughnuts in batches of 2 or 3 (depending on the size of your dutch oven or saucepan) and fry each side until golden brown. This will take roughly 60 seconds per side but always go by the color of your doughnut.
When your doughnut is ready, remove it with your spatula and place them on the places lined with paper towels.
The paper towels will absorb any excess oil to prevent your doughnuts from becoming soggy, and you can move on to your next batch.
Continue frying all of your doughnuts, adjusting the heat as needed, until they are all fried! Let them cool before eating and make the glaze while you are waiting (if you want to make a glaze at all!).
Serving Options And Alternatives
Some people like to eat their doughnuts plain but there are tons of options out there if you want to add that little extra finishing touch to your doughnuts.
We already have added a great quick recipe for a basic glaze but here are some additional ideas for you to try!
Add food coloring to your glaze to add some quirky colors to your doughnuts!
Sprinkle your finished doughnuts with sugar (this works especially well with fried doughnuts).
Melt a bag of chocolate chips and mix it with some ¼ cup of hot cream to make a chocolate doughnut sauce.
Make flavored frosting instead of a glaze to make frosted doughnuts (for example, adding pureed strawberries and confectioners sugar together will make a thick strawberry frosting).
Add lots of decorations like sprinkles, chocolate flakes, silver balls, crushed Oreos, or crushed gingerbread, and the list goes on!
Stack your doughnuts to make a doughnut tower and keep them together using cocktail sticks.
Instead of ringed doughnuts, roll out your dough into long cylinders for doughnut bars instead!
Final Thoughts
So, that is the quickest and easiest way to make your very own batch of doughnuts!
They’re super tasty and fun to try baking yourself so follow the recipe above and good luck!
Have you ever made something so delicious that you wished you could savor it forever?
Only to find that the recipe has now mysteriously vanished from your phone and the entirety of the internet. Yep, there’s not much more painful than that.
Hi, my name is Mark Williams and I have been infatuated with cooking since I was young. I would beg my mother to pull a chair up to the counter so I could watch what she was doing.