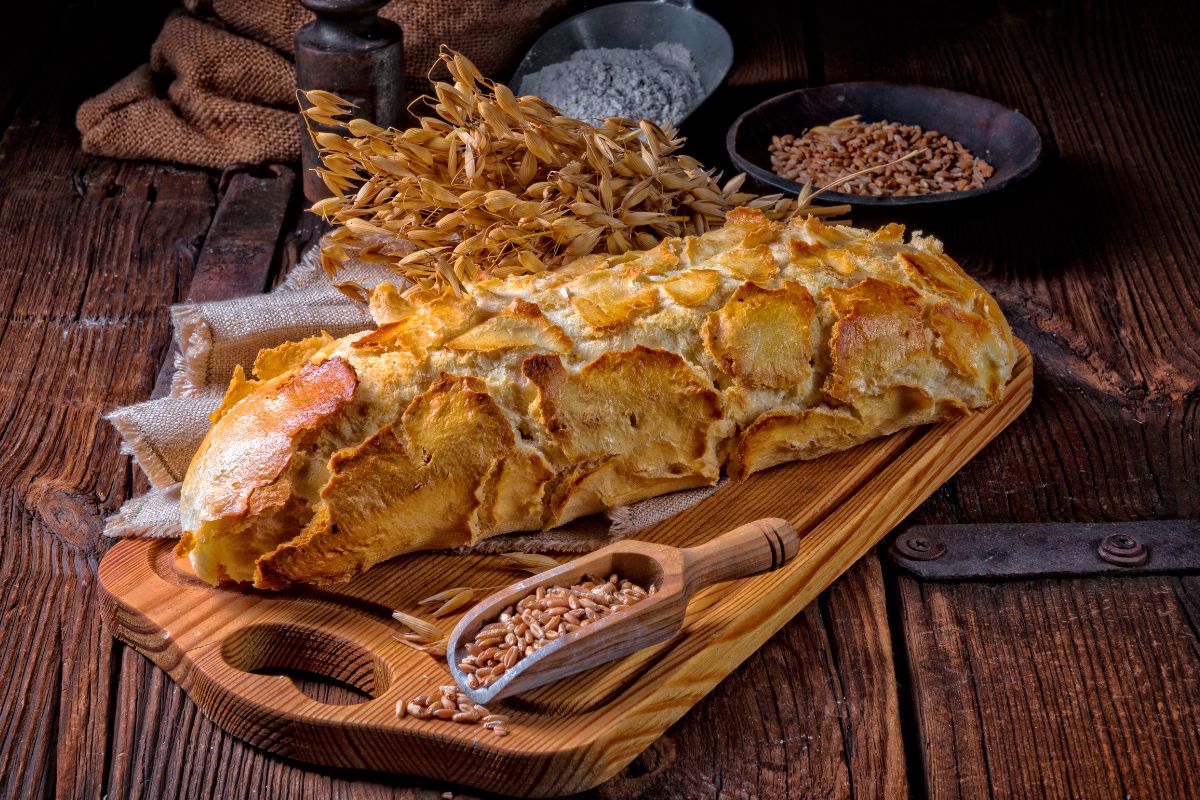
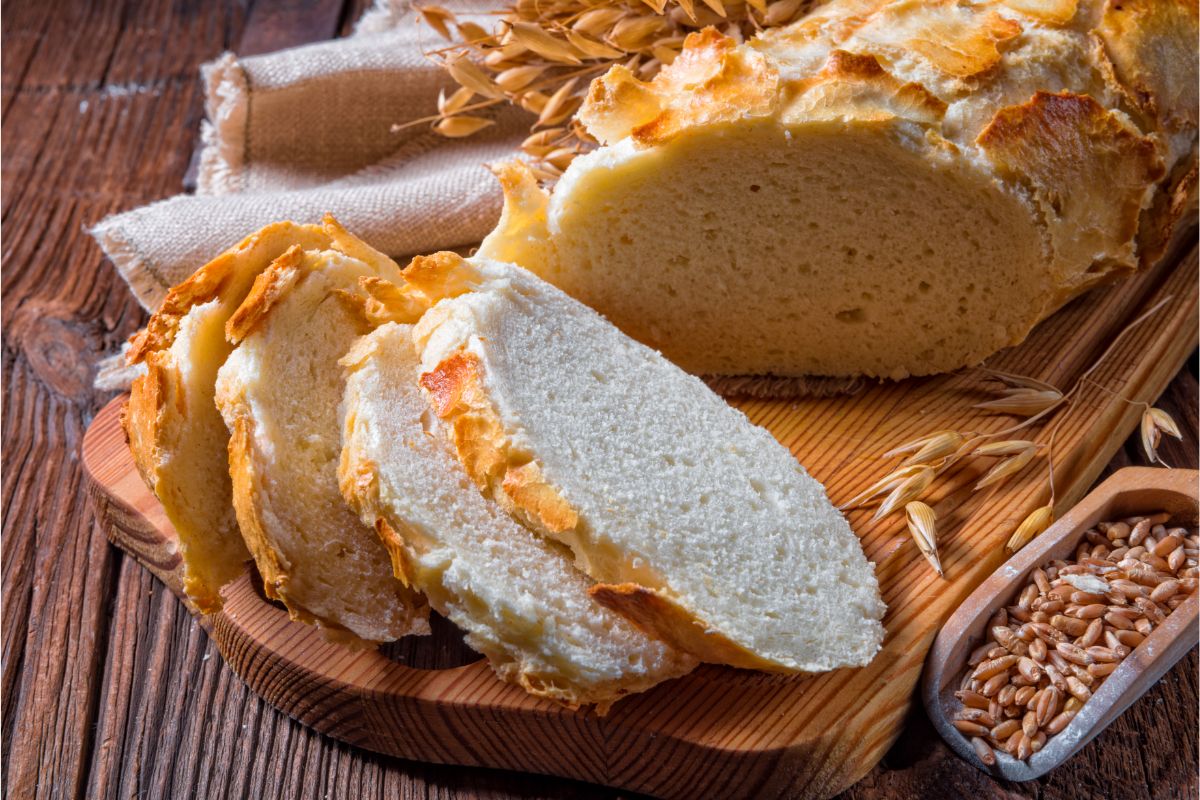
Tiger rolls are known for their pillowy and soft interiors with a crispy and tiger-like exterior. For this reason, they are also known as Dutch Crunch bread, too.

If you’re looking to spice up your sandwiches, then tiger bread is a great option. Plus, it also goes incredible when dunked into soup.
Therefore, if you’re a fan of all things bread, then you need to try out this tiger roll recipe. I mean, just look at this bread – it is the most wonderful thing you have ever seen, let alone tasted!
On the inside, you’re provided with a nice and hearty texture. However, it’s on the outside where things are interesting, with a crispy crust and a cool-looking pattern. The result is a satisfying and delectable bread – you won’t be able to get enough of it.
The pattern could be described as giraffe skin. Hence, this is where its other nickname comes from!
In addition to this, this bread actually has a ton of different names. Whether you know the bread as Marco Polo bread, tijgerbrood or tijerbol, Dutch crunch, giraffe bread, tiger bread, or tiger rolls – you’re sure to love this recipe.
With this in mind, this guide will explore everything you need to know about making the best tiger rolls recipe.
Let’s get started.
What Is Tiger Bread?
Originating in the Netherlands, here, tiger bread is known as tijgerbrood or tijgerbol (tiger roll). It contains a fluffy white and soft white exterior with a distinctive pattern baked on the top which is the result of rice flour paste – providing a distinct crunch and flavor, too.
Since the bread is rich in yeast, this means it contains fat, in this case, it is butter. This ensures that the bread is fluffy and soft.
Likewise, it can be considered a white bread bloomer loaf thanks to the shape of the bread. That said, you can also make it into rolls, too.
These are similar to the bread you would usually make, however, the crunchy exterior features a mottled crust.
How Is The Crust Made?
The distinct pattern on the top of the bread is the result of layering the half-proofed bread with rice flour paste.
Thus, once placed in the oven and baked, the bread will develop a mottle crackly crust.
Since the rice flour doesn’t contain any gluten, it means that once the bread rises and expands during baking, the paste won’t expand and, instead, breaks – creating the bread’s characteristic appearance.
When it comes to tiger bread, there are many different names for the rolls. Some of these include Dutch Crunch Bread, Dutch Tiger Bread (tijgerbolletjes), Tiger Bread (Tijgerbrood), Tiger Rolls, or some people simply refer to it as giraffe bread.
How To Prepare The Rice Paste?
In a bowl, simply combine rice flour with salt, sugar, and yeast. Stir until all the ingredients are thoroughly combined.
Then you’ll want to add the water and oil to create a paste.
You’ll want to make sure the mixture has a consistency that is easily spreadable. Therefore, depending on the consistency, you’ll want to add more or less water or rice flour if it hasn’t reached your desired consistency.
After your bread has finished proofing for 20 minutes, you’ll want to gently brush the surface of your bread with the mixture.
Using a pastry brush, you’ll want to transfer an equal amount of the mixture onto each of your dough rolls.
Once done, you’ll want to cover your rolls again, and leave them sitting in a warm environment for another 40-50 minutes until they have dramatically risen or have doubled in size.
If you have placed them in a cold environment, then it is recommended to proof them for another 15-20 minutes, at least.
How Are Tiger Rolls Made?
Like any other bread or roll, tiger bread is made the same way.
Essentially, all you have to do is allow the yeast to proof, combine all the necessary ingredients to make the dough, allow your dough time to rise, then shape, allow it to rise once again, whip up the rice paste, layer it, and bake!
It is that simple.
Are Tiger Rolls Easy To Make?
When it comes down to it, tiger rolls are pretty easy to make. All you need is time and patience when mixing the ingredients and allowing time for the dough to rise.
Once you have combined all the ingredients, the dough isn’t hard to work with. The toughest decision you’ll have is deciding whether to make bread loaves or rolls.
Although, when it comes to spreading the rice paste, you’ll want to make sure you’re using a delicate hand. Otherwise, you risk the bread dough deflating.
What To Serve With Tiger Rolls?
Once you have finished baking these tiger rolls you can use them exactly the same way you would regular bread rolls.
That said, when used as sandwich bread, this bread really takes center stage. It is thick, delicious, and contains hints of sweetness throughout.
Moreover, thanks to its sturdiness, you are able to pile high as many toppings as you wish.
As opposed to traditional dinner rolls, these ones are a little healthier and thicker (making them perfect for soaking up soups and broth).
As such, they make for the perfect side. For instance, you can go for a rustic roasted garlic potato soup, an instant pot tortellini soup with sausage, or a healthy broccoli cheddar soup.
Alternatively, you can simply eat this bread with a slather of butter and jelly. Likewise, you can even serve it with curry, pasta, vegetable, chicken, sliced ham, beef roast, casseroles, and anything else you desire.
How To Make Tiger Rolls?

Ingredients
For the bread
- Warm water 210 ml (1 cup – 2 tbsp)
- Flour 357 g (2 ¾ cups)
- Salt 1 tsp
- Instant yeast 1 tsp (Active dry yeast 1 and ¼ tsp)
- Sugar or honey (1 tbsp depending on your preference)
- Butter 42.6 g (3 tbsp)
For the crunchy topping
- Water 38 ml (2 and ½ tbsp)
- Rice flour 30 g (3 tbsp)
- Sugar ½ tbsp
- A pinch of salt
- Oil ½ tbsp
- Yeast ¼ tsp
Method
1. Prepare The Dough
In a large bowl, add the sugar or honey, lukewarm water, yeast, and salt and stir together until all the ingredients have dissolved.
Then add the softened butter and flour. Mix everything together to form a shaggy mass of dough.
At this point, you’ll either want to hand-knead the dough or use a stand mixer. If you have a stand mixer, this is much easier.
Once you have kneaded the dough for 8-10 minutes, you should have a smooth and soft dough that will bounce back when pressed. That said, it should still have a tendency to stick to your work surface.
At this stage, your dough is ready for its first proofing.
2. First Proofing
Using a clean bowl, place your dough ball inside and cover the bowl with plastic wrap.
Here, you should leave your dough in a warm environment for approximately 30 minutes.
3. Shape Your Bread
Once your bread has finished its first proofing, you can then shape it into whatever shape you desire.
Here, divide the dough into 8 small balls (around 78-80 g each) and then shape them into either dinner rolls, tiger rolls, or yeast rolls.
At this point, you’ll want to de-gas the dough and then shape your balls into small long loaves.
Once done, place them on parchment paper-lined baking sheets or on a lightly floured baking tray.
Then cover your bread rolls with plastic wrap to prevent them from drying up.
Tip: Make sure to smear some oil onto the plastic wrap to avoid the dough from sticking to the cling film.
4. Final Rising
In a warm environment, allow your shaped dough to sit and rise for approximately an hour.
If the place you’re keeping your dough is cold, then it is recommended to allow it a further 15-20 minutes to rise.
You’ll know it is done once your dough has risen well or even doubled in size.
Moreover, during the proofing process, you’ll want to gently smear your dough with the rice paste.
5. Bake The Bread
Once done, it is time to bake your tiger rolls. Here, preheat the oven to 400 degrees Fahrenheit and bake them for approximately 35 minutes.
After about 30 minutes, you should notice the top of the bread begins to brown. Although, wait a further 5 minutes to allow the top to completely turn golden brown.
Then your tiger bread is ready! Allow it to cool and serve all your family and friends.
The Baking Durations For Different Shapes
If you have shaped your dough as a medium-sized tiger roll (79-80 g each, when divided into 8 equal parts), then you’ll want to bake your rolls for approximately 25 minutes.
For medium-sized loaves (158 g, when divided into 4 equal parts), it should only take around 30-32 minutes for your bread to bake.
For single loaves (640 g each), then you’ll want to bake it for around 40-45 minutes for best results.
Tips and Variations For Making Tiger Rolls
- Thin rice paste – If you find that your flour mixture is too thick or dry, simply add a little bit of water to thin it out.
- Gently add the rice paste – When it comes to brushing your rice paste on your dough, you’ll want to be extra careful. Otherwise, you risk the dough deflating and losing its delicious puffiness.
- Remove any drips – If your rice paste falls onto the baking sheet, you’ll want to make sure to wipe this away.
- Sesame flavor – Here, you can add 1 tablespoon of sesame oil to the rice paste and dough. Plus, you can even add sesame seeds to the top of your bread after applying your rice paste and before baking.
- Different dough shapes – With this recipe, depending on your preferences, you can form your dough into oblong loaves, sandwich loaves, or rolls.
- Allow the rice paste to rest – Before using the rice paste, allow it to rest for approximately 15 minutes.
- Make it healthier – Here, you can add half whole wheat flour with half all-purpose flour for something slightly healthier.
- Plain rice flour – Don’t be tempted to use glutinous or sweet rice flour.
Storage, Make-Ahead, and Freezing Instructions
How To Store Tiger Bread?
For the best flavor, you should eat your tiger rolls on the day of making them. Before placing them in an airtight container, ensure that the bread has completely cooled down.
At room temperature, your bread should last for 2-3 days. When placed in the refrigerator, it should last for 3-4 days.
How To Freeze Tiger Rolls?
Before doing anything, you should make sure that your bread has completely cooled down. Then, you can wrap each roll individually in plastic wrap and then aluminum foil.
Once done, place in an airtight container, a zip-lock bag, or a freezer-safe container. You can freeze bread for 2-3 months. However, just make sure that you label it with the date and recipe.
How To Thaw Tiger Rolls?
You can thaw tiger rolls by placing them on a plate and keeping them in the refrigerator overnight until they have completely defrosted.
This provides you with deliciously soft rolls that taste just as delicious as before. That said, you’ll want to be careful to ensure that they don’t become soggy.
Frequently Asked Questions
Since rice flour is a common pantry ingredient, it can be found in most grocery stores in your area.
When it comes to making tiger bread, you’ll need rice flour. Therefore, you may need to pick up some if you don’t already have any – this can usually be found in the bakery aisle.
If you can’t find it in your normal grocery store, then check out health food stores, such as Sprouts or Whole Foods.
If you prefer, you can choose to completely leave off the rice flour mixture that is used to create the crackled effect on the top of the bread.
The rolls will still come out as delicious, however, they won’t feature the distinct characteristic that makes people look for them.
If you can’t find rice flour, then don’t worry! You can use various gluten-free options instead.
Some great alternatives include almond flour, oat flour, or even potato flour. These flours should have the same reaction to the yeast that the rice flour provides.
While ground rice and rice flour are similar, they are not the same and can’t be used interchangeably.
For instance, rice flour is ground very finely. Whereas ground rice is slightly thicker in texture.
Therefore, in this recipe, it isn’t recommended to substitute rice flour with ground rice.
When preparing the topping mixture, if you don’t mix in the yeast then the top of your bread might not come out with that cracked effect.
Likewise, you may also find that the color won’t come out as dark, either. Since this is a huge factor in adding yeast to the rice flour.
Therefore, when making this recipe, it isn’t recommended to leave out the yeast. You should only leave out the yeast if you don’t want the cracked effect on the top.
If you’re wondering why you have to add yeast here, it is because it helps to ferment the flour. Here, yeast is required to create the tiger bread topping.
There is no difference. These are simply two different names for the same kind of bread. You can call it whatever name you prefer, or simply call it Dutch Crunch, too.
Let’s just say that once you try this bread, it is sure to become one of your go-to lunch sandwiches. There is something special about this type of bread.
On the outside, it features crusty goodness, whereas, in the middle, it is tender, crumbly, and soft.
You can add these additional ingredients if you’re looking to enhance the umami flavor, however, they are not necessary.
Yes! You can freeze tiger rolls. This is ideal for baking ahead of time when you’re looking to feed a crowd.
Once your rolls have completely cooled down, place them in a freezer-safe container and place them in the freezer. These can last up to 3 months.
This is ideal if you have made too many rolls that won’t be eaten straight away. Thus, you can now grab a few rolls out of your freezer and eat them when you want to.
Final Thoughts
If you’re looking for the perfect addition to your soups and broths, then look no further than tiger bread!
Not only is it delicious but it is incredibly simple to make, too! Plus, with the help of this guide, it should be a piece of cake.
One of the most distinctive features of this bread is its crust – which has a tiger-striped effect; hence its name!
Hopefully, we have informed you of everything you need to know about making tiger rolls.
- How To Reheat A Cheesesteak - November 5, 2023
- What Are Three Must Have Kitchen Knives? - September 22, 2023
- How To Protect Edges Of Pie Crust - June 15, 2023


