You may have wondered how pies get their nice decorative edging and thought that it takes a lot of work and knowledge to achieve. Actually it’s quite simple.
If you want to know how to crimp a pie crust we’re going to show you six decorative crimps that will finish off your pie beautifully.
Crimping A Pie Crust
For those of you who are new to baking you may be wondering why people crimp a pie crust. Is it just to look pretty or is there a more practical reason?
Well, it’s both. Crimping the crust of your pies does make them more attractive to look at, and we do eat with our eyes first. So, it makes sense to have a good looking pie crust. But there is also a practical reason for crimping pie crust.
On double crusted pies, pressing down the edges of the pastry all the way around the pie you are creating a strong seal that keeps the pastry intact and prevents the filling from oozing out.
It also prevents steam from escaping and so ensures that the pie filling cooks properly too.
For single layer pastry crusts crimping the edges provides a tall edge to maintain the structure of the pie and keeping it intact.
Standard Finger Crimp
Begin by trimming the pastry to 1 inch wider than the edge of the pie pan. This will give you enough pastry to work with and give the edge some strength and structure.
Now fold the edge of the pastry underneath to create a tall lip around the edge of the pie.
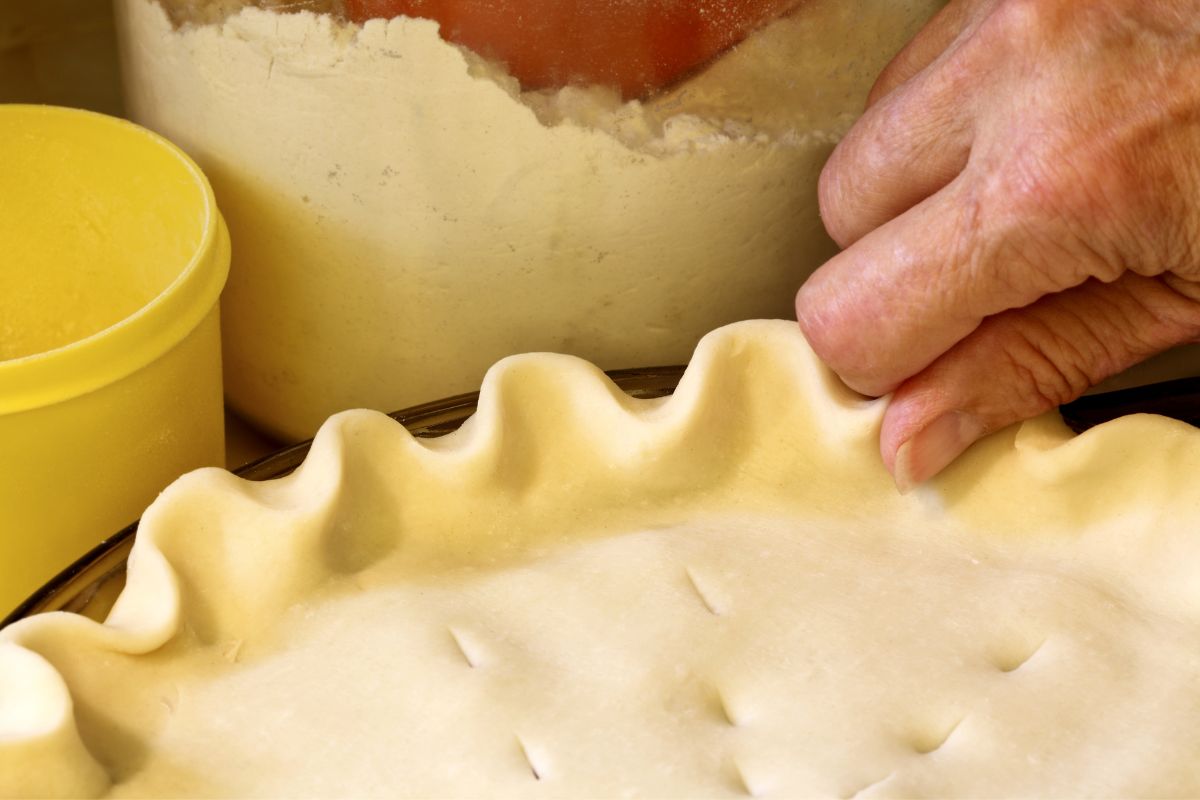
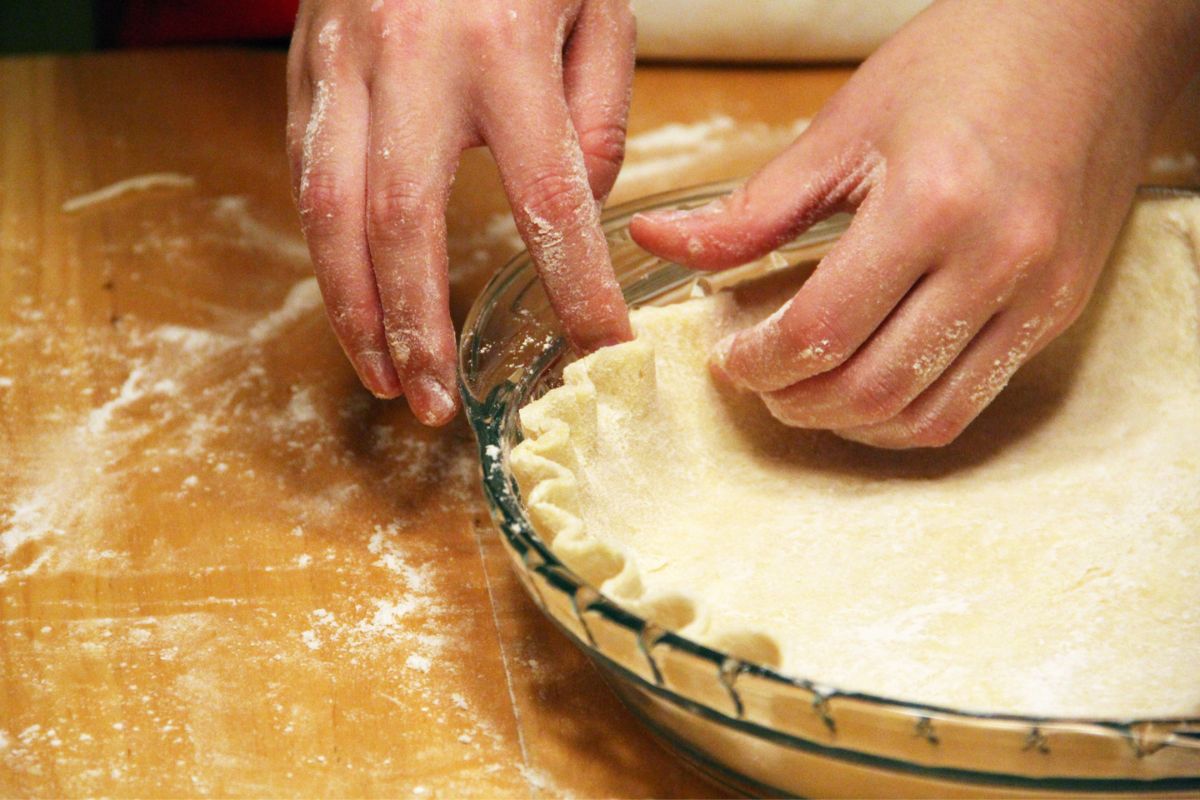
The standard finger crimp is one of the easiest pastry edgings to achieve. With the index finger of one hand press the pastry from the inside towards the outside to make even indentations around the edge of the pie crust.
Your index finger and thumb on your other hand will support the crimp from the outside of the pie dish making sure you don’t push the pastry off the edge of the pie dish.
This crimping creates a decorative and strong edge to the pie.
Pinch Crimp
The pinch crimp is another easy to achieve crimping technique. It is very similar to the standard finger crimp.
As with the previous crimp you will be working from the inside to the outside of the pie edge.
Using the index finger of one hand press the pastry outward but this time instead of just providing support with your other index finger and thumb you now want to pinch the pastry to a point. This is where this particular technique gets its name from.
Rope Crimp
The rope crimp gives a great effect to the edge of your pie crust. It looks very decorative but it is deceptively simple.
Hold your hand in a loose fist. Now with the inside of your thumb and the knuckle of your index finger take a piece of the pie crust and squeeze it gently to create a raised edge.
Move your hand an inch or so at a time and repeat the process around the whole circumference of the pie. This will create a rope effect on the edge of the pie which will look amazing when it is baked.
Scallop Crimp
For a scallop crimp you need to flatten the edge of the pie crust. Trim the pastry the same as before, an inch wider than the pie dish, but flatten it against the rim, so it has some depth.
Now take a teaspoon and holding it upside down press the tip of it into the pastry twice, one slightly back from the other.
Move around the pie crust and continue making indentations with the tip of the teaspoon around the whole edge. This is an easy technique but creates a wonderful scallop effect on your pie crust.
Standard Fork Crimp
The standard fork crimp is probably the most widely known method of crimping the edge of a pie crust. It is an incredibly easy way of making the edge of your pie crust strong but also decorative.
Again you need to flatten the edge of the crust around the rim so that there is some depth for you to work with. Now take a fork and working your way around the edge of the pie press the tines of the fork gently into the pastry to create a pattern.
Wheat Crimp
When you have attempted all these methods of crimping pie crust you may feel confident enough to take on something a little more complicated. But don’t worry it’s not that difficult.
To create the effect of shafts of wheat around your pie edge you just need a pair of kitchen shears and a little bit of patience.
Working your way around the edge of the pie crust, snip the pastry at a 45-degree angle to a depth of about half an inch. Repeat this every half to three quarters of an inch all the way around the circumference of the pie.
When you’re done cutting, using your fingertips pull the cut segments apart in opposite directions, one toward the inside of the pie dish and toward the outside so that they flare apart from one another.
Do this all the way around. As you pull the segments apart, pinch the tips of each one so that they are more almond shaped.
This decorative effect will look wonderful when your pie is baked and is a great way to decorate a pie for Thanksgiving.
In Conclusion
Crimping your pie crust is not just about making it look pretty and appealing, although that is one reason. By crimping the edges of your pie crust you are giving it strength and substance.
You can also experiment with different designs and patterns. Try using different kitchen utensils to achieve new and interesting effects for your pies.
We hope you have enjoyed our guide on how to crimp pie crust and that you will enjoy the results.
Have you ever made something so delicious that you wished you could savor it forever?
Only to find that the recipe has now mysteriously vanished from your phone and the entirety of the internet. Yep, there’s not much more painful than that.
Hi, my name is Mark Williams and I have been infatuated with cooking since I was young. I would beg my mother to pull a chair up to the counter so I could watch what she was doing.